A device that is triggered upon the expiration of a designated time interval is called a time relay - the device has found wide application in electrical engineering, electrical engineering, and electronics. Thanks to its use in circuit solutions, it is possible to implement more flexible control functions for various equipment and devices.
Depending on the design and principle of operation of the device, electrical circuits of various complexity can be organized.
We propose to understand what types of time relays exist, what is their specificity of operation and application. The theoretical material is supplemented with practical recommendations for connecting and setting up a temporary control device.
Electronic devices are represented by a constructive variety, therefore, the principle of a time relay device should be considered taking into account each design variation separately.
This looks like one of the many designs of time relays. In fact, the device resembles an ordinary switch, the action of which, however, is tied to the cycle of the passage of time
From the point of view of the actions performed, in practice, electromagnetic, pneumatic, electronic structures and devices on the clock mechanism are used.
Option # 1: electromagnetic devices
Electromagnetic devices are generally designed to operate exclusively in DC-powered circuits.

The design of the REV-814 electromagnetic time relay: 1 - stationary contacts unit; 2 - bracket; 3 - copper damper mechanism; 4 - square; 5 - core of the winding of the main circuit; 6 - anchor; 7 - moving contacts of the armature
The range of operation in time is usually 0.07 - 0.11 sec on turn-on and 0.5 - 1.4 sec on turn-off. The design of such time relays contains two working windings, one of which is a short-circuited circuit in the form of a copper ring.
When an electric current passes through the main winding, an increase in magnetic flux is noted. This flux forms a short-circuited winding current, due to which the growth of the magnetic flux of the main winding is limited.
As a result, the time characteristic of the movement of the armature of the actuator is formed, or, in other words, a time delay for switching on is created.
For example, thanks to the device, the following possibilities open up:
- switch lighting systems at a given time;
- start or stop technological equipment;
- activate / deactivate security systems.
The device is small in size and has several function control keys. Using the system keyboard, the user can easily customize (program) it.
Conclusions and useful video on the topic
The video clip examines the possibility of using a modular device, where there are two independent time switching devices. The scheme provides for the inclusion of two household appliances, setting their operation in time intervals and other functions.
Of course, all existing modifications of the time relay cannot be covered with one modest overview. To consider the entire range of instruments will require a whole book to be written. Actually, reference books on timers of different types are available, and if you wish, you can always find the necessary information.
Do you have something to add, or have questions about the operation, selection, connection and configuration of the time relay? You can leave comments on the publication and participate in discussions. The contact form is in the lower block.
Time relay (timer) for light - a device that turns on and off in automatic mode electric lighting at specified time intervals.
Did you have to feel your way along the dark paths of the cottage when you appeared there after sunset? Were you upset by the sight of a light bulb burning around the clock in an empty staircase of a multi-storey building? Did the fish and algae in the aquarium suffer from lack of light due to your forgetfulness?
Time relays for lighting control will help to avoid such troubles.
These smart devices create a comfortable environment for human life and save energy.
All of them are plastic monoblocks with controls located on the front panel and differ in a number of parameters.
 By the principle of action:
- electronic;
- electromechanical.
By the frequency of work:
- daily allowance;
- weekly;
- astronomical;
- countdown time;
- accidental on-off;
- universal.
By installation method:
- outlet;
- stationary, mounted on a DIN rail in an electrical panel or in a back box.
By operating conditions:
- by the permissible power of consumers;
- by the degree of protection against external factors.
Let's consider in detail each of the types.
Light Timer Features
 Electronic time switch for light
It is a microprocessor controlled device. Programmable with buttons located on the front panel.
The readings are displayed on the liquid crystal display. The power supply is either a battery or a rechargeable battery.
Its advantages:
- the ability to set small switching intervals (up to 1 minute);
- high stroke accuracy (deviation< 1 сек/сут);
- saving the program during a power outage;
- visibility of the set indicators;
- a wide range of models that meet any requirements for the frequency of operation, installation method (in the electrical panel and in the socket) and operating conditions.
As a disadvantage, only more complex programming and potential problems with the exhaustion of the battery resource can be noted.
Any lighting control tasks are solved using electronic relays.
 Electromechanical time relay
This is a device in which the timing mechanism works by means of a synchronous electric motor powered from the mains.
It is used with a daily and less often - with a weekly frequency of work.
It is programmed using front panel levers and a graduated wheel.
There are mobile socket and fixed, DIN rail or back box-mounted models.
The advantage of electromechanical devices is ease of setup, but in a number of parameters they are inferior to electronic ones:
- lower accuracy;
- the minimum switching interval is higher (10-15 minutes);
- after a power outage for models not equipped with a rechargeable battery or battery, the program crashes.
A typical malfunction for this type of relay is failure due to wear of the gears of the adjusting wheel.
The breakdown cannot be eliminated on your own - you will have to contact the service.
Types of light timers
When choosing a device, it is necessary to determine the frequency of its operation necessary for the consumer.
For some purposes, it is better to use electronic models, for others - electromechanical (with all the inherent advantages and disadvantages).
 Daily time relays
Serve to set a certain sequence of switching lighting devices during the day (at the same time every day).
They are convenient to light up the aquarium lamps at the right time, turn on the lights, turn off neon advertisements at night, turn on the illumination of fountains in parks on summer evenings ...
Devices with both operating principles can be used.
If the minimum switching interval and second accuracy are not critical, then it is better to choose simpler electromechanical models.
 Weekly light timers
Sometimes the desired time for changing the lighting mode depends on the day of the week. For example, de-energizing production premises and switching on on Friday should be done one hour earlier than on other days. In such conditions, the use of daily timers will be ineffective.
Output - setting of weekly relays. Their working cycle is programmed for 7 days and repeats at the same frequency.
For these purposes, mainly electronic devices are used. Depending on the model, they differ in the number of memory cells and the ability to set more or less parameters.
If the weekly timer is programmed in the same way for every day, then it will act in the same way as the daily one.
Astronomical time relays for lighting control
If the length of the day changes with the change of season, it is prudent to adjust the operating time of the lighting devices.
The electronic astronomical timer, which takes into account the duration of daylight hours in different months, will cope with this function. The actual programming cycle for this device is 1 year.
Countdown timers
So that the lamps in the entrance do not burn around the clock and the person does not feel discomfort, groping for the steps in the dark, devices with a countdown are used.
Entering the front door, the tenant turns on the light, and the electronic relay will automatically turn it off through installed by the program period (1-2 minutes). Both convenient and economical!
Relay of accidental on-off
For the safety of the home, when the owners are not at home, you can create an imitation of the presence. An electronic relay for accidental switching on and off of light will cope with such a task.
Using the built-in random number generator, it turns off and lights the lamps in the rooms in a random sequence at different intervals, frightening off intruders.
Universal devices
If the consumer needs to use several of the listed functions, then it is wiser to choose a universal device. It can combine, for example, the ability to seasonally change the program with the ability to turn off the lighting after a given short period of time.
But keep in mind that such devices are more expensive, more difficult to set up and operate. Therefore, do not chase after the number of programs, but choose only those that are needed.
Installation
When choosing a device, think about what purpose it will serve and how to install it. 
Socket relays
The use of socket relays is possible with lighting fixtures that have a standard plug for connecting to a household AC network.
The indisputable advantages of this type of equipment:
- compactness;
- mobility;
- ease of installation and operation;
- installation without connecting wires.
However, they are unsuitable for controlling the lighting system of an apartment as a whole and are not designed for significant power, in which case you can pay attention to the programmable ones.
 Stationary timers
If the consumer is faced with the task of managing not individual devices, but the lighting network of a house or enterprise, then stationary devices should be chosen.
They are mounted in a back box or on a DIN rail switchboard... Requires additional, in comparison with the outlet, efforts and material costs.
But it provides the unity of the system control and the ability to connect large capacities.
Exploitation
 When choosing a device, take into account the operating conditions: think about what equipment you will connect to it, and where you will install it.
Permissible power of consumers
Strictly observe the rule: the total power of the consumers connected to the timer must not exceed its own power.
The necessary data is in the technical documentation of the equipment and on the packaging labels.
Time relay protection from external factors
Unfavorable influence of external factors (water, dust) can adversely affect the timer operation. Therefore, the degree of its protection (IP - Ingress Protection Rating) must correspond to the operating conditions.
Light Timer Manufacturers and Models
The desire to improve the comfort of life and conserve energy resources increases the popularity of timers for light. As a result, electrical companies have mastered the production of this type of product.
Let's consider what models are offered to the consumer by European manufacturers.
Hager Group (Germany)
The company was founded in 1954 in Bliskastel. Produces low-voltage equipment, electrical cabinets, circuit breakers, automatic machines,. The main factories are located in Germany and France. The annual net profit is over 1 billion euros.
Manufactures electronic and electromechanical light relays.
 |  |  |
| Operating principle | ||
| electronic | electromechanical | electronic |
| Periodicity | ||
| weekly | daily | weekly |
| Switching time | ||
| 1 minute | 15 minutes | 1 minute |
| Number of contacts | ||
| 1 | 1 | 2 |
| Accuracy | ||
| +/- 1 sec / day | not indicated | +/- 1 sec / day |
| Rated current | ||
| 16 A | 16 A | 16 A |
| Mounting method | ||
| Din rail (1 seat) | Din rail (1 seat) | Din rail (1 seat) |
| Voltage | ||
| 230 V | 230 V | 230 V |
Models presented the highest quality... The most expensive EG203 has a number of additional advantages: an accidental on-off function, a five-year power reserve from a lithium battery, and a key that blocks unauthorized program changes.
FINDER (Italy)
Founded in 1954, the company specializes in the production of timers. The product catalog includes more than ten thousand items.
The company ranks 3rd in Europe among manufacturers of electromechanical relays, branches are open in 21 countries.
 |  |  |
| Operating principle | ||
| electromechanical | electromechanical | electronic |
| Periodicity | ||
| daily | daily | weekly |
| Switching time | ||
| 30 minutes | 15 minutes | 1 minute |
| Number of contacts | ||
| 1 | 1 | 2 |
| Accuracy | ||
| not indicated | not indicated | +/- 1 sec / day |
| Rated current | ||
| 16 A | 16 A | 16 A |
| Mounting method | ||
| Din rail (2 seats) | Din rail (1 seat) | Din rail (2 seats) |
| Voltage | ||
| 230 V | 230 V | 230 V |
The features of the presented models are a short switching time for electromechanical timers (15 minutes) for Finder 12.11.1 and an additional power option (24 W DC or AC) for Finder 12.21.2.
The general advantages of the relay of this manufacturer are high IP (product protection class) and operation in a wide temperature range.
THEBEN AG (Germany)
The company was founded in Stuttgart in 1921. Its specialization is the production of equipment for the control and management of electrical consumers (smart sockets, etc.). Today the company has representative offices in 53 countries.
 |  |  |
| Operating principle | ||
| electronic | electromechanical | electromechanical |
| Periodicity | ||
| weekly | daily | weekly |
| Switching time | ||
| 1 min | 15 minutes | 2 hours |
| Number of contacts | ||
| 1 | 1 | 1 |
| Rated current | ||
| 16 A | 16 A | 16 A |
| Mounting method | ||
| rosette | rosette | rosette |
| Voltage | ||
| 230 V | 230 V | 230 V |
Theben-Eltimo 020 S DCF and Theben-timer 26 are standard socket-mounted time switches. Their common advantage is compactness and portability.
Of interest is Theben-timer 27 - an electromechanical device with analog programming. It has a high (weekly) frequency for this type of device and a non-standard switching time - 2 hours.
How to choose
When choosing a device, first of all, outline the goals to be achieved. In accordance with them, you can determine the required set of options and the accuracy of work.
You should not chase multifunctionality and raise the bar when there is no need for it: there is no need to use an astronomical timer to maintain a home aquarium with a daily cycle and on-off periods of at least half an hour.
Do not forget to check the power of the relay: it cannot be less than that of the consumers planned for connection. And, of course, the IP (degree of protection) must correspond to the operating conditions.
In situations where the possibility of a non-constant supply of power to the objects of electricity consumption is needed, time relays, motion sensors, photocells or an astronomical timer are installed in the system.
In situations where the possibility of a non-constant supply of power to the objects of electricity consumption is needed, a time relay, motion sensors, photocells or an astronomical timer are installed in the system.
Astronomical timer is a programmable electronic-mechanical device for turning on or off power on a section of a circuit in a programmed mode.
It is mainly used to turn on / off lighting based on sunrise / sunset. It can also be used for any other purpose where it is necessary to "dose" the supply of electricity.
Astronomical timer circuit
The astronomical timer circuit is shown below:
- Power supply terminals
- Output contact group
- LCD display
- Instrument programming panel
The principle of the timer is quite simple. The mechanical timer is set by pressing the corresponding buttons. Electronic programmable. The display shows the device menu. Switching between points, entering the coordinates of the location is carried out using the keys on the programming panel. The astronomical timer instruction explains in detail all the nuances of setting the timer, both electronic and mechanical.
Be sure to check the instructions for the device.
Any user of the device can connect the astronomical timer. It is enough to read the instructions and have electrical skills.
Astronomical timer connection
The astronomical timer connection diagram is simple and should not cause difficulties and questions.
Power supply contacts - 1 and 2.
Output terminals - 3 and 5.
Phase wires are always broken, zero is fed to a straight line.
The phase wire from the electrical panel is connected to pin 4.
Terminals 5 and 3 are wired with terminal 4.
When switching one circuit, terminal 5 must be free.
Before setting the astronomical timer, it is important to know the time error, how accurately you can set the time. Knowing these nuances of operation and settings of the device, you will be sure of the reliability of its functionality.
Light timers or time relays are devices that automatically turn on the lighting at the programmed time. Light timers help to avoid various hassles of lighting control, such as:
- In the aquarium, the lights were not turned on in time, which causes algae and fish to suffer.
- At the entrance of the house, lighting is turned on during the day and at night unnecessarily.
- The garden area does not have lighting after sunset, although electricity is supplied to the garden.
Such smart devices are necessary for humans because they create comfort for life and save energy. They are made in the form of plastic monoblocks with a panel on the front side of which there are controls. Timers are classified according to their properties.
Typical Timer Differences
By the principle of operation, light timers are divided into:
- Electromechanical.
- Electronic.
By the period of work:
- Universal light timers.
- Random commutation.
- Countdown time.
- Astronomical.
- Weekly.
- Daily allowance.
By installation method:
- Stationary, mounting in a panel, box or DIN rail.
By working conditions:
- The class of protection from the external environment.
- Rated power of connected consumers.
Timer properties
Electronic relay
Light timers controlled by a microprocessor. Programming is carried out using the buttons on the front panel. Parameter values are shown on the LCD display, the power source is a rechargeable battery or a rechargeable battery.
The advantages of an electronic relay are:
- A wide range of modifications to suit any requirement for operating interval, installation method and operating conditions.
- Visibility of certain parameters.
- Writing a program to memory when the device is turned off.
- Increased accuracy of readings.
- Creation of small switching ranges, up to 60 seconds.
Among the shortcomings, one can name the complex creation of programs, problems that arise when the battery fails.
To control the lighting, they resort to using electronic relays.
Electromechanical relay
This time-reading device operates with a synchronous motor connected to the mains supply. It is used for weekly and daily work frequency. Timer programming consists in controlling the graduated wheel and levers located on the front panel. 
There are light timers: stationary, which are installed on a rail or in an installation box, as well as a socket type.
If the smallest switching range and accuracy in seconds are not important, then a simple model of an electromechanical type timer is the best choice.
Dignity electromechanical timers can be called ease of adjustment. But in comparison with electronic samples, such models are inferior in parameters:
- Increased smallest switching range, up to 15 minutes.
- Low running accuracy.
- Program crash due to lack of auxiliary power supply.
A common failure of this model is a malfunction of the adjusting wheel due to wear of the gear teeth. To eliminate the cause, the assistance of a qualified technician is required.
Varieties of light timers
When choosing a device for switching on the light by time, it is necessary to calculate the periods and the range of the timer. Electronic models are used in their areas of work, and for peculiar conditions, electromechanical timer devices may be better suited, taking into account their disadvantages and advantages.
Daily timers
Daily relays are designed to determine the order of switching lighting devices for a daily period, that is, at the same time every day. They are convenient for inclusion in certain time lighting an aquarium, lighting a video camera, turning off neon advertisements, starting lighting an evening fountain in the park. 
The main disadvantage of the daily timer is that the time of sunsets and sunrises is constantly changing, this requires a constant restructuring of the mechanism for different times. And this creates discomfort and inconvenience in work. If you do not rebuild the timer, then after some time the relay will give significant errors in the on time. For example, the lamps will turn on when it is not required, when there is still sufficient illumination level.
Weekly timers
It is often necessary to switch the lighting on a specific day of the week. For example, it is necessary to turn off the premises of the production workshop, turn on the security alarm on Friday one hour earlier than other days. A daily timer is not suitable for such tasks.
The operating cycle is drawn up for a 7-day program, the process is repeated every week. For such tasks, electronic timers are mainly used. According to the models, they differ in the number of memory cells and the method of determining the number of parameters.
If for the weekly relay the program is made the same for every day, then its operation will correspond to the daily timer.
Astronomical timers for lighting devices
With changes in the duration of daylight hours due to the seasonality of the season, it is better to adjust the connection time of the lighting equipment. For such tasks, it is optimal to use an astronomical timer, which will take into account the duration of daylight hours in different periods of the year. The real cycle of the program of operation of the astronomical model of the timer is one year.
Countdown timers
Such models of timers are used mainly in the entrances of houses so that the lighting is not turned on all the time and, at the same time, a person, entering the entrance in the dark, does not look for steps without light and does not feel discomfort.
Upon entering the entrance, a person turns on the light, the countdown timer starts, and turns off the light automatically through the programmed time range without human intervention. It is an economical solution with comfort for people.
Random light timer
This timer is designed to create the safety of an unattended home. When the owners are not at home, the presence effect is set on the timer. The timer of accidental turning on of the light is designed to cope with this task. Its design has a built-in generator of random variables, which, in a random order with various arbitrary time ranges, turns on and off the lights in different rooms, creating the effect of the presence of the owners of the house.
Universal light timers
If the customer needs to apply several different functions, then the universal timer model would be the best choice. It combines a seasonal change-over function with a short-time switch-off function.
These types of devices are more expensive, more difficult to operate and configure. You do not need to chase a large number of software functions, it is better to choose what is right for you.
Installation of timers
When choosing a timing device, it is necessary to determine the goals and tasks that it should perform, with the method of installing the device.
Socket type relay
The use of a relay to connect to an outlet is possible with lighting devices with a standard 220 volt AC home power plug. 
The advantages of these timers are:
- Installation without auxiliary wiring.
- Mobility, can be carried to any outlet.
- Small dimensions, compactness.
- Easy to operate and easy to install.
But they will not be suitable for controlling the lighting of the entire apartment, they will not be able to provide high power to consumers. For such purposes, there are other programmable socket models, for example, with WI-FI.
Stationary time relays
If it is necessary to create a control over the general lighting of the whole house or at the enterprise, and not by individual devices, then fixed-purpose light timers are chosen. 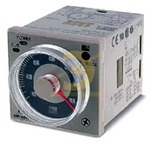
They are installed in a special box or on a switchboard rail. Such an installation requires additional efforts in comparison with the socket type, and also requires material costs. But the advantages overlap the disadvantages: unity of control is achieved and the possibility of supplying consumers with high power in the system is achieved.
Permissible lighting power
When connecting a timer to work, the total power rule must be followed. In total, it should not be more than the power of the lighting timer. The required parameters are indicated in the instructions for the equipment, or indicated on the information plate.
Protective timer function from the external environment
Environmental factors such as dust, water and other factors adversely affect the operation of the timer. The IP security class must be selected according to the operating conditions.
Timer selection
Before choosing a timer, first determine the goals you want to achieve. In accordance with the goals and objectives, the required functionality of the device and its accuracy during operation are determined.
You should not choose a device that has a lot of functions, if this is not useful to you, you do not need an astronomical timer when working with a home aquarium, in which there is a daily lighting cycle, and the on and off ranges are about 30 minutes. Check the power of the timer, it should not be less than the power of the consumers of lighting devices. The degree of protection is also needed such that will satisfy the operating conditions.
Hello, dear readers and guests of the site "Notes of an Electrician".
Today I decided to automate the control scheme for the cold water pump in our workshop.
The fact is that at present, before the work shift at 7-00 in the morning, you have to manually turn on the pump using a push-button post, and in the evening after the end of the work shift at 18-00, turn it off.
In the morning, sometimes you forget to turn on the pump and each time you have to return to the control panel, and in the evening, sometimes, you forget to turn it off and it can continue to work all night. It’s even worse when you forget to turn off the pump, leaving for the weekend, and it will remain “threshing” all these days.

So for the process of automating the switching on and off of the pump, I decided to use the TE-15 weekly electronic timer from IEK.


In one of my articles, I talked in detail about, but in this case it will not suit us, because During the week, we have a different pump operation algorithm: from Monday to Friday it is turned on from 7-00 to 18-00, and on weekends it is turned off. It is not possible to organize this using the Orbis Mini T QRD daily timer, which is why I used the weekly TE-15.
Similar TE-15 weekly timers are available in catalogs not only for IEK, but also for TDM and EKF. Look, they are completely the same, both in appearance and in technical characteristics. Straight like twin brothers - spot the differences?


In this article I will tell you about technical characteristics, connection diagram and programming of the TE-15 timer from IEK.
Appearance and dimensions.


Application and specifications
The TE-15 weekly electronic timer is required to count the time and automatically turn on (off) electrical consumers at set intervals. The scope of the timer is very wide and you can enumerate examples endlessly, here are a few of them - this is automatic control:
- lighting advertising banners, billboards, building facades, street shop windows
- room ventilation motors
street or yard lighting
lighting of administrative and amenity and industrial premises
pump motors, for example, for pumping water from a well or watering plants
heating electrical appliances
Technical characteristics of the TE-15 electronic weekly timer:
- supply voltage 230 (V)
- rated current of the output contacts 16 (A) at cosφ = 1 and 8 (A) at cosφ = 0.4
- number of channels - 1 (single channel)
- own power consumption 5 (W)
- number of programmable cycles - 8 on and 8 off
- minimum programmable time interval (discreteness) - 1 minute
- error no more than 2 seconds per day
- weight - 159 grams
Of the advantages, I would like to note the simple setup and programming - it is even easier to set up than an alarm clock on a modern phone.
I would like to say a few words about its shortcomings. In my opinion, the number of programmed cycles could be increased. In this regard, an increase in the output channels immediately suggests itself, i.e. to control 2, 3 or 4 independent loads with one timer. By the way, while setting the timer, I found that the number of programmable cycles is actually 8, and 16, which could not please - so keep that in mind.
The listed disadvantages, or rather even the wishes for this model, are smoothed out by its cost, which ranges from 1300-1800 rubles at the date of this writing.
Installation and construction
The TE-15 digital timer can be installed in electrical panels with a degree of protection of at least IP30. The operating temperature should be within the range from -5 ° C to + 40 ° C.
The timer is mounted on a standard DIN rail. It occupies 2 modules in width, i.e. 36 (mm) - see the drawing of its overall dimensions.

The timer has a built-in rechargeable battery that provides up to 150 hours of operation up to about 6 days. During this time, all programmed cycles are completely saved in the device's memory.
On the front side of the timer there is a protective cover, under which buttons for control and programming are hidden, and an LCD display.
Read about the purpose of each button in the text below.


When the lid is closed, only the screen with the current time is visible in the window. For example, the current time is 22-43.

There is also an "On" LED on the front side. red, which symbolizes the status of the timer. If this indicator is on, then the timer is in operating mode and its output relay is on, i.e. performs the programmed cycle, if it is off, then the timer is in the waiting mode for its next cycle.

Wiring diagram for timer TE-15
Here is the TE-15 connection diagram, taken from the passport.

To power the timer, an operating voltage of 230 (V) is required, the phase and zero of which are connected to terminals (1) and (2) - the polarity does not matter.
Here is an example of a timer wiring diagram with a load up to 16 (A).

A circuit breaker is installed as a protection device, in this case BA47-29 with a rated current of 16 (A). The phase from the machine is connected to terminal (1).

We take zero from the zero bus N and connect it to terminal (2).

The load is connected to the relay output contacts, which are changeover. Terminal (4) common terminal. Contact (3-4) is normally open (N.C.), and contact (4-5) is normally closed (N.C.). Here is a confirmation of this.


The rated current of the output contacts is indicated in the technical specifications (see above in the text). Here I will explain a little that 16 (A) is about 3520 (W) at cosφ = 1 or 8 (A) - this is about 1760 (W) at cosφ = 0.4. The former includes a purely active load such as electric heaters or incandescent lamps, and the latter includes an active-inductive load, for example, fluorescent lamps, electric motors, transformers, Appliances etc.
If you need to connect a more powerful load or a three-phase load (electric motor, etc.) to the timer, then you need to add a contactor to the circuit, for example, or even better, otherwise the output contacts will very quickly melt, stick or burn out, generally fail.
In my example, the power of the three-phase electric motor of the pump is 2.2 (kW) with a rated current of 5 (A), which means that I need to connect a contactor to the timer, and control the electric motor with its power contacts. In my example, I will connect the ESB 24-40 modular contactor from ABB to the timer.

Control circuit:


Shield "Tyco" for 9 modules, IP40.

Power circuit.

After connecting the timer, you can proceed to its setup and programming.
Programming and setting of the TE-15 timer
We turn on the feeding machine. When the timer is turned on for the first time, the LCD will be turned off. Click on the "Reset" button.

Within a few seconds, the previously programmed cycles (setpoints) are cleared (reset). At this time, absolutely all symbols on the display will light up.

After the reset, the display shows the start time 0-00, the set timer mode “Auto Off” and the day of the week “Su” (Sunday).

The days of the week are displayed on the screen in the form of well-known Latin abbreviations:
- Mo (Monday - Monday)
- Tu (Tuesday - Tuesday)
- We (Wednesday - Wednesday)
- Th (Thursday - Thursday)
- Fr (Friday - Friday)
- Sa (Saturday - Saturday)
- Su (Sunday - Sunday)
The timer can be displayed in either a 24-hour clock or 12-hour clock with an “AM” (before noon) or “PM” (afternoon) indicator. To switch between one or another scale, you need to press and hold the "Clock" button for 6 seconds (in fact, switching occurs in about 3 seconds).


Personally, it's more convenient for me when the time is calculated on a 24-hour scale, so I will leave it.
First of all, we need to set the current time and day of the week. This is done as follows.
Press the "Clock" button and, without releasing it, press the "D +" button. Each subsequent press on "D +" on the screen will change the day of the week in a circle. For example, I set it to Tuesday, i.e. Tu.

Then, without releasing the "Clock" button, press the "H +" button. Each subsequent press on "H +" on the screen will change the clock of the current time, depending on the set 12-hour or 24-hour scale. In the same way, we set the time in minutes, only now we press the button "M +".
I have set the current time to 21-07.

The TE-15 weekly timer has 4 operating modes.
Switching between modes is carried out by alternately pressing the corresponding button "Mode". The selected mode is shown on the display. The difference between the modes is the initial state of the relay output contacts, according to this table.

Thus, I can control the load, both in the automatic mode "Auto Off" and "Auto On" at the set time, and in the manual mode - "On" or "Off".
Now let's program a timer for my example - pump motor control.
Once again I will repeat about the necessary pump operation algorithm. On weekdays (Monday to Friday), the pump should work from 7-00 to 18-00, and on weekends - not turn on at all.
To begin with, select the "Auto Off" mode: contact (3-4) is closed, (4-5) is open, the output relay of the timer is off, the LED is "On." does not burn.
So, the set pump operation algorithm is not complicated for us - for this we will need to program only one cycle.
Press the "P" button. The display will show the indication "1 ON" and dotted lines - this indicates that the first cycle of switching on the load is ready for programming.

Then we press the "D +" button one by one and select the required days of the week.

There are many different variations you can put up here:
- any one day of the week
- three days of the week (Mo, We, Fr)
- three days of the week (Tu, Th, Sa)
- two days off (Sa, Su)
- three days of the week (Mo, Tu, We)
- three days of the week (Th, Fr, Sa)
- five days of the week (Mo, Tu, We, Th, Fr)
- six days of the week (Mo, Tu, We, Th, Fr, Sa)
- all days of the week (Mo, Tu, We, Th, Fr, Sa, Su)
We just need five working days, i.e. Monday to Friday - Mo, Tu, We, Th, Fr.

Now we press the "H +" button and set the time (clock) at which the timer will turn on the load. Each subsequent press on "H +" on the screen will change the clock of the current time, depending on the set 12-hour or 24-hour scale.
I put up 7 o'clock in the morning.

In the same way, we set the minutes using the "M +" button, but in my example, they do not need to be set.
Click on the "P" button. The display will show “1 OFF” and dotted lines - this means that the first cycle of load disconnection is ready for programming.

By analogy, we set the days of the week and the load off time. In my example, the pump should be turned off at 18-00 on weekdays, i.e. Monday to Friday - Mo, Tu, We, Th, Fr.

Done. Now, to save the set timer settings, press the "Clock" button.

This concludes our programming. It remains to connect the load to the timer according to the above schemes and check its performance.
If you suddenly made a mistake with the time or date, then you can make changes to the programmed cycle. To do this, press the "Clock" button until the number of the cycle in which you decided to make changes appears on the screen. Then press the "Mode" button - the time of this cycle will be reset (dotted lines will appear on the screen) and use the "D +", "H +" and "M +" buttons to make the necessary changes. Then press the "Mode" button twice and the "Clock" button once to save the changes.
Example of a lighting control circuit using a timer
I will connect the socket to the output contacts (4-5) of the timer, and turn on the light bulb in the socket.

For this, I connected the phase from the machine to terminal (5), from terminal (4) - to one of the socket terminals. To the other terminal of the socket, I connected zero from the zero bus N. In this example, the PE protective conductor remained unconnected for me - you shouldn't forget about it.

As a load, I connected a 9 (W) LED lamp, with which I have repeatedly conducted my experiments (s).

For clarity, I programmed 3 lighting control cycles and checked the timer. Works fine.

See my video for how the digital timer works.
P.S. This, perhaps, is all. If you have any questions, ask them in the comments or by email. Thanks for attention.