The health of the hard drive, like any other component of a computer or laptop, needs to be monitored so that it does not fail ahead of time. In this article, we will get acquainted with the built-in OS Windows utility hard disk check chkdsk. With its help, we will diagnose the HDD and fix the existing errors.
The hard drive is an integral part of the computer and a careless attitude towards it can disable it, in which case everything that was on it all its working time will be lost and it is unlikely to help here on its own. And in order not to bring to such a case, you need to at least occasionally check HDD for errors. Today I won't talk about powerful utilities, such as Victoria or MHDD, about them another time. In today's article, we will consider the built-in utility in the Windows operating system - chkdsk, which is designed to check the hard drive and fix problems on it.
And so, you need to open the command line. You can use Start - in the search for cmd, or use "Win + R", the "Run" dialog box will open, enter - cmd in the line and click OK. The Windows Command Prompt will open.
Enter the command there: chkdsk c: /f /r
Where chkdsk is the hard drive check command
c: - the letter of the hard drive, if there are several disks or partitions on the computer and you need to check another, just enter the desired letter, for example d: or e:
/f - sets error correction on HDD.
/r - fixes errors on the disk and restores part of the data that can still be read.
There are other commands, to get acquainted with them you need to enter the command: chkdsk /?Where a complete list of chkdsk commands will be displayed.
After entering the command, the utility should start scanning. As soon as the scan ends, it will display its results. If you want to scan the system disk or partition (C), then the following message will appear on the command line:

The program will not be able to scan the system disk while it is running, so you need to restart your computer. And in order for the scanning to start immediately before loading the OS, you must enter at the bottom of this message on the command line Y and press Enter. The computer will restart and the disk scan will begin.
Built-in utility in Windows for HDD checks can be run without the command line, it has a graphical mode. In order to start scanning in graphical mode, you need to enter My Computer, select the desired drive, for example C: / click on it right click mouse, in the drop-down list of the context menu, select "Properties". Next, on the "Tools" tab, under the "Check disk" item, click on "Run a check."

In the window that opens, click "Start".

If you check the system disk (C), then the computer will ask you to restart (Schedule disk check) and only then start checking before loading the OS, but if you need to check any other disk or partition, the scan will start immediately.

How to disable chkdsk scanning at startup?
Sometimes users encounter such a problem when the chkdsk utility automatically starts scanning the HDD when the computer boots. This happens because errors are found on the hard drive and the system automatically tries to fix it. It is not recommended to disable automatic scanning of chkdsk, it can damage your hard drive. If you still decide to turn it off, then you can do it like this: enter on the command line - chkntfs /x c:d: and press Enter.
Where "c" and "d" are drive (partition) letters. And after that, automatic scanning of chkdsk at startup will be disabled.
This concludes the review of the CHKDSK built-in Windows program for checking and fixing errors on a hard disk, if you have any questions on this topic, please contact us.
Even the most "licked" and the most secure operating system is by no means guaranteed against failures perceived by the user as errors. Particularly annoying are unknown and unexpectedly occurring errors, sometimes fraught with extremely unpleasant consequences.
It's not hard to imagine the emotions of a person working on a complex document that gets lost as a result of a windows system crash. To avoid such problems, it is better to prepare for them in advance. And for this you need to be aware of how the Windows 7 OS is checked for errors. Let us consider separately two serious questions related to the stated topic:
- Checking system files and windows registry.
- Monitor the status of your computer's hard drive.
The old-timers of the computer world remember well the utilities of the world-famous Peter Norton - not only the author of excellent books, but also the creator of programs under the Norton utilities brand. The first versions of these programs worked even before the advent of windows - in the MS DOS operating system, which was popular at that time. These utilities made it possible to detect the presence of errors on the hard drive and to detect the presence of other DOS problems. We will be interested in similar tools for windows.
Files and registry
Checking OS files can be done in two ways: either using standard windows tools, or using a third-party software. The OS has built-in file control tools. To use their capabilities, you need to open a command prompt window and type the sfc command in it with the /scannow parameter, like this:
As a result, system files will be scanned to detect errors in them. The result will be displayed immediately in the command line window.
 The information received can be analyzed (at least using the same Internet), which is useful for determining the degree of depreciation of the OS and equipment. During operation, the program will try to fix all detected violations in system files on the disk.
Additional service, more high quality scanning and the reliability of corrections is provided by third-party software.
For example, the same Norton Utilities (NU) package for windows. Although this tool is the most popular and powerful software package for dealing with OS and computer malfunctions, it still costs a lot of money. Especially in its "professional" configuration. Nowadays, on the Web you can find many free analogues of this creation.
windows registry- the very place where, in addition to the necessary OS information, a lot of rubbish and garbage accumulate. Periodic cleaning of the registry is our direct responsibility. For this purpose, it is worth installing and periodically running the time-tested CCleaner utility (although NU also does a good job of this task). Look it up online and download it.
HDD
The appearance of errors in the file structure on the hard disk is caused by the wear of the disk surface, failures in the operation of windows disk services (drivers) and errors in the positioning of the laser subsystem of the hard drive. You can check and cure a hard drive in ways similar to the previous ones. We will consider the easiest way - running standard program the disk error checker that comes with windows. For this:
- Open the "My Computer" shortcut, select the icon of any of the partitions (for example, "Local Disk C").
- Open the context menu with the right mouse button.
- Select "Properties". A tabbed window will open.
- Go to the "Service" tab
- Click on the "Perform verification" button.
 The program will examine the partition and troubleshoot. Do the same for the rest of the sections.
windowsTune.ru
Check disks for errors in windows 7

One of the important factors in the health of the system is the health of such a basic component as hard drives. It is especially important that there are no problems with the drive on which the system is installed. Otherwise, problems such as the inability to access separate folders or files, regular crash logout, " blue screen death" (BSOD), up to the inability to start the computer at all. We will learn how to check the hard drive for errors on Windows 7.
See also: How to check SSD drive for mistakes
Ways to study HDD
If you have a situation that you can’t even log into the system, then in order to check if the problems on the hard drive are to blame for this, you should connect the disk to another computer or boot the system using a Live CD. This is also recommended if you are going to check the drive where the system is installed.
The verification methods are divided into options using exclusively internal Windows tools (Check Disk utility) and options using third-party software. In this case, the errors themselves can also be divided into two groups:
- logical errors (damage file system);
- physical (hardware) problems.
In the first case, many programs for studying a hard drive can not only find errors, but also correct them. In the second case, using the application, it will not be possible to completely eliminate the problem, but only mark the bad sector as unreadable so that no more recording is made there. Complete hardware failure hard drive can only be repaired or replaced.
Method 1: CrystalDiskInfo
Let's start with an analysis of options using third party programs. One of the most popular ways to check the HDD for errors is to use the well-known CrystalDiskInfo utility, the main purpose of which is precisely to solve the problem under study.


If several physical HDDs are connected to the computer at once, then to switch between them for information, click the "Disk" menu, and then select the desired media from the list.

The advantages of this method using CrystalDiskInfo are the simplicity and speed of research. But at the same time, with its help, unfortunately, it will not be possible to eliminate problems if they are detected. In addition, it must be recognized that the search for problems in this way is rather superficial.
Lesson: How to use CrystalDiskInfo
Method 2: HDDlife Pro
The next program that will help assess the condition of the drive used under windows 7 is HDDlife Pro.


To update the data, you need to click "File" in the main window of HDDlife Pro and then select "Check disks now!".

The main disadvantage of this method is that the full functionality of HDDlife Pro is paid.
Method 3: HDDScan
The next program with which you can check the HDD is the free HDDScan utility.
Download HDDScan


Method 4: Checking with the Check Disk utility through the properties of the drive
But you can check the HDD for errors, as well as fix some of them, using the built-in windows 7 utility called Check Disk. It can be launched in various ways. One of these methods involves launching through the properties window of the drive.

Method 5: "Command line"
The Check Disk utility can also be run from the Command Prompt.


If the user wants not only to carry out research, but also to automatically correct the errors found in the process, then in this case the following command should be entered:
Press Enter to activate.

If you want to check the drive for not only logical, but also physical errors (damage), and also try to fix bad sectors, then the following command is used in this case:

When checking not the entire hard drive, but a specific logical drive, you need to enter its name. For example, in order to scan only partition D, enter the following expression in the "Command line":

Accordingly, if you need to scan another disk, then you need to enter exactly its name.
The "/f" and "/r" attributes are the main ones when running the chkdsk command through the "Command Line", but there are a number of additional attributes:
- /x - disables the specified drive for a more detailed check (most often used simultaneously with the "/f" attribute);
- /v - indicates the cause of the problem (the ability to apply only in the NTFS file system);
- /c - Skip scanning in structural folders (this reduces the quality of the scan, but increases its speed);
- /i - quick check without detailing;
- /b - re-evaluation of damaged elements after an attempt to fix them (used exclusively with the "/r" attribute);
- /spotfix - spot fixes for errors (only works with NTFS);
- /freeorphanedchains - instead of restoring content, clears clusters (only works with FAT/FAT32/exFAT file systems);
- /l:size - specifies the size of the log file in case of an emergency exit (without specifying the size, the current value remains);
- /offlinescanandfix – offline scanning with disconnection of the specified HDD;
- /scan - proactive scanning;
- /perf – increase the priority of scanning over other processes running in the system (used only together with the "/scan" attribute);
- /? – calling the list and attribute functions displayed through the “Command line” window.

Most of the above attributes can be used not only individually, but also together. For example, entering the following command:
chkdsk C: /f /r /i
will allow you to quickly check section C without detailing with the correction of logical errors and bad sectors.

If you are trying to perform a check with a fix on the disk on which the windows system is located, then you will not be able to immediately complete this procedure. This is due to the fact that this process requires an exclusive right, and the operation of the OS will prevent this condition from being met. In this case, a message appears in the "Command line" that it is impossible to perform the operation immediately, but it is proposed to do this the next time the operating system is rebooted. If you agree with this proposal, then you should press "Y" on the keyboard, which symbolizes "Yes" ("Yes"). If you change your mind to carry out the procedure, then press "N", which symbolizes "No" ("No"). After entering the command, press Enter.

Lesson: How to activate the "Command line" in Windows 7
Method 6: Windows PowerShell
Another option to run the media scan procedure for errors is to use the built-in windows PowerShell tool.

As you can see, you can check the hard drive for errors in windows 7, both using a number of third-party programs, and using the built-in Check Disk utility by running it in various ways. Error checking involves not only scanning media, but also the possibility of subsequent correction of problems. True, it should be noted that it is better not to use such utilities too often. They can be applied when one of the problems that were described at the beginning of the article appears. For the purposes of prevention, it is recommended to run programs for checking the drive no more than once every six months.
We are glad we were able to help you resolve the issue.
Poll: Did this article help you?
Not reallylumpics.ru
Check for errors on the hard drive. Check hard drive for errors, windows 7
Often, unstable computer operation is associated with errors in the HDD file system. To deal with this problem, you need to check for errors on your hard drive. Among other things, it would be nice to know about the state of the hard drive if it makes strange sounds, such as clicks or rattles, while the PC is running. If information about hard disk damage is obtained in advance, you can save all user data until the device fails.
Victoria
First of all, you need a specialized program. One of the best and most reliable is Victoria. With its help, on any operating system, a hard disk check for errors can be performed. whether you have windows 7 installed, XP or 8, Victoria will work stably under each.
The application is absolutely free and can be downloaded from the developer's website. However, it is distributed in two versions. The first is the standard binary packages to run on the OS. The second is an ISO image to run without having to boot the operating system. This is handy when windows refuses to work due to HDD errors.
If the HDD has a capacity of about 700 GB, it will take at least one to two hours to check the hard disk for errors. windows 7 will perform this procedure with built-in tools much faster. However, the quality of testing and the amount of data obtained with the help of "Victoria" will be disproportionately higher.
Testing
Download the app first. It comes in an archive. Extract it to any empty directory and double click on the executable. If the work is done in windows 7 or 8, you need to right-click on the exe file, and then select in context menu the inscription "run with administrator rights".

Checking hard disk for errors should begin with a few preparatory steps. After starting the program, go to the "Standard" tab. On the right side of it, you can see all the drives in the computer. Select the HDD to be tested. Then click on the "Passport" button. If nothing goes wrong, the name and model of the hard drive will be displayed at the bottom of the window.

After that, go to the tab called "SMART" and click on the inscription "GetSMART". If the status next to the button changes, then everything is done correctly. This area usually displays the word "GOOD", but "BAD" may also appear. Both in the first and in the second case, the sensor data were read correctly.
Possible mistakes
It happens that the HDD controller works in AHCI mode. In this case, there is no way to read the SMART attributes, so the hard disk cannot be checked for errors. The program will send the message "Error reading SMART" to the log. Also next to the button, which is responsible for reading data from the sensors, “Non ATA” will be displayed, and the area under the text itself will be highlighted in red.
To allow Victoria to work with the hard drive, you need to change the BIOS settings. To enter them, you should press the "DEL" button several times at the time when the very first messages appear on the screen when the computer boots. How to run the utility BIOS settings may differ for different models motherboards. If the "DEL" key does not lead to a positive result, you should familiarize yourself with the information that is easy to find on the developer's website.
After entering the BIOS, go to the path Config (maybe Advanced) - Serial ATA - Controller Mode, and then change the setting to Compatibility. Remember that after the hard disk test is completed, the settings should be returned to their original state.
Continuation of the check
After reading the SMART information correctly, go to the "Test" tab and click on the inscription "Start". This will start checking for errors on the hard drive. In the main area of the program, rectangles that were previously monochromatic will be painted in different colors. On the right, the total number of sectors sorted by access time will be written.

The main attention should be paid to the numbers near the blue and red marks. They mark dead or broken sectors. That is, those to which access is impossible, or it takes a very long time to read them. Thus, when accessing them, the computer seems to freeze.
Recovery
To attempt to recover bad sectors, the hard drive's error checking must be run again, but now set the switch on the bottom right to the "remap" position. The program will mark the "bads" as non-working, entering their addresses in a special area on the HDD.
Be carefull! If bad sectors began to appear on the hard disk, most likely, after the restoration, the drive will continue to "crumble". It is advisable to replace it or at least make a backup copy of all important data by copying them outside the HDD.
Built-in tools
The tools built into the OS can also check the hard disk for errors. windows 8 allows you to run it in a few clicks.

- First, open File Explorer by clicking on the "My Computer" icon.
- Then right-click on any section and select "Properties".
- Go to the tab called "Service", and in it click on the inscription "Perform verification".


Check hard drive for errors via command line
The command line is a powerful tool that is used by many system administrators when solving various system problems. Its main advantage is the launch of testing even when the graphical shell refuses to start. In this case, it is worth using "safe mode with command line support" by pressing the F8 key during download windows, but before the logo is displayed on the screen.

If the standard mode works fine, follow these steps to run the scan:
- Press the combination "windows + R" on your computer keyboard.
- In the input line of the window that opens, type "cmd.exe" and click on the "OK" button.
- A command line will appear on the screen. To run the check, write "chkdskX: /f /r" into it. Instead of the letter "X", press the one that is used in the operating system to indicate the partition that needs testing.
- After entering the OS, it may not be possible to complete the procedure without the obligatory reboot of the PC. When the message appears, simply press the "Y" key and restart your computer. After that, error checking on the hard disk will start automatically.
Remember: when performing a HDD check, you should wait for it to complete. Turning off this process must be performed only by means built into the program. If there is no way to stop the procedure, do not try to interrupt it by turning off the computer or by pressing "RESET". These actions can lead to additional errors and data corruption on the hard drive. The most dangerous thing is the impossibility of restoring information after an incorrect shutdown.
fb.ru
How to check windows for errors
If your computer often freezes, won't launch some programs, or crashes, it makes sense to check operating system for mistakes. They are sometimes so serious that the only way to solve the problem is to reinstall the system.
To prevent serious damage to the system, check disks for errors from time to time. To do this, use the error checking service. Go to "My Computer", select one of the disks, call the "Properties" menu by right-clicking on the disk. In this menu, select the "Service" section, then "Check the disk for errors."

Disk defragmentation helps to prevent the occurrence of serious system errors. It is recommended to do this at least once every six months. Go to the start menu. Select "All Programs" - "Accessories" - "Utilities". In this section, start defragmenting the disk you need.

If you notice that a certain error appears regularly, you can try to find its cause and description in the OS. To do this, go to "Start", select "Control Panel" - "System and Security" - "Administrative Tools" - "Event Viewer". Next, carefully examine the items "Application" and "System". Errors will be marked with a red cross in a circle. By clicking on an error, you will read a message about its cause. You can solve the problem by going to the windows website and indicating the error number there.

If you are an active Internet user, do not forget about a reliable antivirus. This software far exceeds the reliability and capabilities of standard system components. Antivirus and firewall can protect your computer from viruses and the operating system from errors. Choose proven software, such as Kaspersky, Dr.Web, Eset NOD32 and more.

Various utilities also help to identify and fix system errors. For example, CCleaner or IObit Security 360 programs. They help diagnose the system and, having identified errors, fix them.

Remember that stopping or interrupting the system error checking is prohibited. This may result in disk damage or data loss.
SovetClub.ru
How to Check Hard Drive for Errors in Windows 7
This article will help you understand and fix problems on your PC. First you need to figure out why you need to check your computer for errors. As a rule, you can observe the presence of a situation when the computer starts to reboot, while giving out some sounds like tapping.
Also, the PC may restart several times a day, and even when the computer is turned on, the startup may be interrupted by the so-called screen of death. Screen of death refers to a blue screen with white text. It is to prevent such problems that you need to carry out diagnostics.
Using the standard windows utility


Using the CHKDSK command
- Click "Start", select "All Programs", click "Accessories" and run the "Command Prompt" utility;
- For example, we want to test our disk (D :), then we should specify the “chkdsk / r” command in the window and click on Enter.
This command of the windows operating system makes it possible to diagnose the HDD and detect errors. It will also notify you of any problems it finds.
Syntax and parameters of the CHKDSK command
The command CHKDSK [volume:[[path]filename]] ] starts the actual hard drive diagnostics in windows. In this case, you should not enter square brackets on the command line.
Volume - indicates the disk on which the check or any other operation will be performed.
Path, file name - lists the name of the object or objects that will be worked on. Applies to FAT/FAT32 file system only;
Description of other parameters:
- /F - completely fixes all found problems;
- /V - command for file NTFS systems, which shows what was the cause of the problem;
- /R - execution searches for and restores incorrect information;
- / X - if there is such a need, it completely disconnects the disk from the system for a deeper and more thorough check. Typically used with the /F command;
- /I - less detailed diagnostics of disk elements. Produces the so-called "quick check";
- /C - makes it possible to skip checking cycles inside the folder structure, the check is also fast, but not deep;
- /L:size - makes it possible to change the size of the log file to the specified value (in kilobytes) during the scan. In the event of a crash, a log file is used during the check;
- /B - the ability to re-evaluate bad clusters on the disk (only with the /R option).
The process of identifying errors on a hard disk in windows may take time depending on the speed of your computer and the presence of errors on this disk.
All modern homes have a desktop computer or laptop. Someone needs it for games, someone - for work or study. In any case, photos, some important records, contact details of people, necessary addresses, etc. are stored on the computer. And the place where all this information is stored is the hard drive.
Not without reason, experienced programmers say that in a situation where a computer has a hard disk error, formatting it is a real disaster. After all, formatting is fraught with the loss of all information. But this is the case if you do not take appropriate measures. But if you notice some errors and failures in the disk operation in time and correct them, then this global catastrophe can be avoided.
The main causes of HDD problems are "bad" sectors - segments of disk space that are somehow damaged.
They are divided into physical and logical. The latter appear with software errors and can be corrected, while the physical ones cannot be corrected. In the latter case, you will have to replace the hard drive.
Such damaged areas can appear on both magnetic and standard SSD drives.
Causes of bad sectors and errors
Railway failures depend on the type of damaged sections:
- brain teaser"broken" - displayed with malware or viruses, as well as with a sudden power outage or power cable during recording;
- physical"broken" - are found on a completely new product. Then you need to contact the manufacturer with a request for a replacement product.
In magnetic drives, “broken” sectors can appear as a result of wear and tear of the moving parts of the device, when foreign bodies get on the disk mechanism, or when they fall to the floor. In the latter case, the magnetic head of the disk is scratched, which leads to its errors.
SSD drives give errors because they have tried to write any information to them many times.
Checking "hard" for "broken" sectors is quite realistic. Windows has a "chkdsk" (Check Disks) application. You need to open a folder on the desktop or in the Start menu "My computer" by clicking on the drive to be checked. Using the context menu, select "Properties" - "Service". Under the phrase "Check" there will be a button, by clicking on which, you can see the number of "broken" sectors.
During the check, the computer will eliminate errors in logical "broken" sectors, as well as mark areas with physical damage.
Attention! You can start the check system manually, however, if Windows detects "broken" sectors on its own, the utility will start itself when the system starts.
Verification Utilities
Some software does not have a built-in check. For such cases, there are special programs that help identify "broken" sectors and errors and, if possible, correct them.
"Victoria"
It is a popular software for finding damaged areas. Apart from various ways analysis and reassignment of problem areas, has the function of searching for damaged contacts in the loop, as well as the function of evaluating the performance of the hard drive. The only "minus" of the program is the lack of official assemblies. Therefore, experts recommend using it separately from the OS.
HDD Regenerator
This utility uses its own methods to restore "broken" sectors (a combination of high and low signals) and supports any drive connection interfaces.
The downside is the high cost of the license ($90).
One of the best and multifunctional utilities for checking the device for damaged areas. Has the following functionality:
- restores and reconfigures sectors;
- fixes partition tables;
- restores files and creates them backups;
- selects files in the table;
- copies data of deleted partitions;
- backs up data.
This utility uses several methods to detect problems, as well as the ability to track SMART attributes and clean up the hard drive.
Important! The program supports everything Windows versions, however it does not scan/test the drive where the OS is installed.
With the help you can check one or more hard drives simultaneously.
Seagate Seatools for Windows
The application supports all modern Windows systems. With it, you can do both basic and advanced testing. More simple than Seagate Seatools for DOS but less powerful.
If the HDD is making strange noises or there are problems writing and reading information, you should use one of the programs to check the hard disk for errors. Depending on the task (checking the disk surface for damage, searching for bad sectors, fixing errors, etc.), different software may come in handy.
You can quickly check the disk for errors using standard system tools, but to restore the hard drive, you will need special third-party programs. By learning how to check the health of a hard drive using various utilities, a user of any level will be able to cope with the problems that have arisen.
The CheckDisk system service is the simplest hard drive diagnostic program that is not able to find complex errors and fix bad sectors, but is useful for fixing basic problems. It is available on all versions of Windows and can be used to check drives of any type. All users need to know how to check hard drive for errors with this tool.
The GUI version of the utility is the most convenient for novice users. You can start it through the disk management menu, which can be accessed in two ways:
- in Windows XP/Vista/7 - select the "Management" item in the "My Computer" context menu, then go to the desired menu;
- in Windows 8/10 - press the Win + X combination and select the appropriate item.
In the window that opens, select the device that needs analysis, right-click on it and select "Properties" from the drop-down menu. Going to the "Service" tab, you need to run the hard drive diagnostic program.
The system will check and automatically correct errors if the disk is in this moment not busy with read or write processes. Otherwise, the program will offer to test after restarting the PC. If necessary, in the test results window, you can see detailed information about the status of the HDD.
The GUI version does not always save, since sometimes it is required to check the status of the hard drive from safe mode or without starting the operating system at all. In such cases, the console comes to the rescue, which can be started before the system starts using boot disk.
After opening the recovery console, you need to run the chkdsk / f command, which will check all connected drives. In some cases, this will help fix the error. However, in most situations, if the failure of the HDD has led to the inability to start the system, a deeper check of the condition of the hard drive will be required.
To use the console command from inside the system, you need:
- launch the command line (via Win + X or by entering cmd into the Run window);
- enter the chkdsk command with the letter of the section to be checked and additional flags;
- confirm the operation by pressing Y.
Checking the HDD via the command line will be a little faster than using the GUI version of the program, the results will be shown right here in the console.
The Linux system also has standard tools - hdparm and smartctl, launched from the console.
Simple programs for quick HDD check
If standard utilities are not suitable, hard drive diagnostics can be carried out using simple third-party programs. They allow you to get more information about the health of the HDD, but in case of serious problems they will not work, since you cannot fix the breakdowns with their help.
HDDScan is a free program that performs analysis in two modes:
- in terms of S.M.A.R.T.;
- linear processing.
The tool evaluates the speed of reading and writing in various sectors, marking "slow" cells. In the course of the analysis, the program makes sure that the tested hard drives do not overheat; at the end of processing, the user is presented with a complete report.
HDDScan good versatility. The utility allows you to check disks for errors regardless of the type of devices: it can be used to check external hard disk, and analyze a RAID array, SSD drive or memory card.
Crystal Disk Mark has only one function - it evaluates the speed of reading and writing. Despite this, it is often used, since it is still possible to check the hard drive for serviceability with just two indicators.
For the test, different algorithms are used, one of which is the sequential recording mode. The program gradually fills all the space on the drive with blocks of the size specified by the user, after which it cleans the HDD. The same technique is used by hard drive manufacturers to check product quality. Its disadvantage is that it accelerates the wear of SSD drives.
CrystalDiskInfo and DiskCheckup similar in function set, differ only in interface. They check the state of the hard drive using S.M.A.R.T. algorithms and compile a history of checks, which allows you to track the dynamics of changes. CrystalDiskInfo has more options for visualizing history. For example, you can build a graph, not just get a written report.
Another feature of these programs is a convenient notification system. Hard drive deep tests usually take a long time. If the user needs to move away from the computer, he can turn on notifications of critical HDD errors by E-Mail.
Programs from hard drive manufacturers
Some HDD manufacturers have developed their own utilities for analyzing the state of the hard drive. They are intended for use with devices of the same name, it is possible to diagnose a hard drive from another company with their help, but this must be done carefully. Unlike more simple programs, these utilities have versions in different languages, including Russian. What program is better to analyze the state of the HDD?
Seagate's proprietary program exists in two versions: a standard version for running under Windows and a DOS version in iso-image format, from which you can make bootable flash drive. It is recommended to use the second option, since the check in this case will be more accurate and efficient.
SeaTools uses part of the S.M.A.R.T. to test the hard drive without giving details about each item. Three tests can be done:
- short HDD self-test;
- short express test;
- a long check in which all sectors are sequentially read.
During the check, the program automatically corrects the errors it finds.
Owners of hard drives from WD should be aware of how to check the performance of hard drives using proprietary software from this manufacturer. Its set of features is similar to that of the program from Seagate, but somewhat expanded and allows for deeper work with the affected device.
There are two additional functions:
- deep disk formatting - the program writes zeros to all sectors, irretrievably destroying information;
- blocking access to bad sectors - the program marks bad blocks, excluding the recording of new information in them.
Unlike SeaTools, this HDD diagnostic program can be freely used with devices from any manufacturer to check the hard drive for errors - no problems have been identified with this.
Deep Testing Software
If you need not only to check the hard disk for errors, but also to fix bad sectors, you can not do without complex software that performs the most in-depth analysis of the state of the HDD.
Victoria HDD
According to many users, Victoria HDD is the best hard drive troubleshooting software. The program has received such a reputation due to its wide range of functions.
Victoria exists in two versions:
- with a graphical shell for use from within Windows;
- with a DOS shell to create a boot disk.
It is better to use the second version. HDD diagnostics outside the system allows you to achieve better results, so it is always recommended to follow the principle - "if possible, I test the disk from the boot disk." As a last resort, you can use a LiveCD of another OS, for example, Linux distribution like Ubuntu.
Victoria HDD has a variety of functions:
- quick and complete disk check;
- reassignment of bad sectors and their recovery;
- checking the status of contacts in the IDE or SATA cable;
- equipment performance analysis;
- viewing S.M.A.R.T. indicators.
When checking, you need to pay attention to the access time to sectors. It should not exceed 200-600 ms. You can also see the temperature of the disk during operation, but this is not so important.
HDD Regenerator
HDD Regenerator is a software for professional hard recovery disk. She not only marks bad sectors as unused, but also tries to reanimate them. For this, not a standard deep formatting method is used, but a proprietary algorithm based on the transmission of signals of different levels to the sector. Despite the professional level, inexperienced users can also use this software, since it is not difficult to test a hard drive with its help thanks to a convenient Russian-language interface.
Program features:
- ensuring the safety of data - it works only in read mode;
- support for different file systems;
- the ability to scan the surface of the disk;
- real time monitoring.
The program is not suitable for everyone, since you can check the hard drive for operability with it for free, but you will have to pay $90 for the sector recovery function.
If you do not want to pay, you can use TestDisk - free program, which can restore the partition table, boot sectors and MFT. It also detects bad sectors, can recover deleted information and fix file system errors. The only drawback is the lack of a graphical interface, you have to work from the console.
If after checking the HDD and fixing all the problems, the computer does not stop working incorrectly, it is worth checking the registry. Perhaps the failures are not caused by hardware failure, but by internal system errors.
A computer or laptop is associated precisely with errors and malfunctions in the hard drive. In this article, we will figure out how to check the health of a hard drive using Windows tools and programs specially designed for this.
Check for errors by standard means
This method is equally effective for Windows XP, Vista, 7, 8 and 10. You must:
If a notification appears "Windows cannot check the drive that is currently in use", You should click "Check Schedule".
So, now we are doing a reboot, and when the system boots, the health test through the BIOS and the media error corrections will start. Its duration can be from 2-3 minutes to an hour, depending on the characteristics of the hard drive and its capacity.
Check hard drive for errors via command line
To start the scan, you must perform the following steps: go to "Start / All Programs / Accessories / Command Prompt". Right-click and click "Run as administrator".

In the window that appears, execute the command "chkdsk disk_partition: check_parameters". It should be taken into account that this way works exclusively with drives that have been formatted in FAT32 or NTFS.
An example command would be "chkdsk C: /F /R". Its essence is as follows:
- Section C will be checked for errors;
- Found problems will be automatically fixed (parameter F is responsible for this);
- Bad sectors will be checked and information restored (parameter R);

If you want to diagnose the drive currently used by the system, you will see a special notification. You will be prompted to run the scan the next time you boot your computer. To agree with this, press Y, to refuse - N. Based on the results of the check, information about the verified data, the number of bad sectors and the errors found will become available to you.
For a complete list of options, run chkdsk with a question mark as an option. But if you need a simple check for errors and sectors, then the above information will be enough for you.

It happens that the errors found during the scan cannot always be corrected immediately, it is likely that this is due to the program running at that time. In this situation, an offline scan of the drive is required: it is disconnected from operation, diagnostics are carried out, and then it is connected back. To do this, you need to enter “chkdsk C: / f / offlinescanandfix” at the command line (C: is the disk partition). If it is not possible to disable it, then the check will be performed at the next reboot.

If necessary, after the check, you have the opportunity to examine the check log. For this you need:
- Go to Windows Logs / Applications;
- Right-click on Application / Search;
- Search for the word Chkdsk;

Program check
Of course, the above method is not always effective. Therefore, we will consider a number of programs such as Victoria. They will allow you to conduct the most thorough analysis of the state of the hard drive on a computer or laptop.
Victoria

A utility for diagnosing and testing a hard drive. It will help you not only to detect problems in its operation, but also to eliminate them.
The program has a number of advantages and useful functions:
- Reads the hard drive passport and provides detailed information;
- 5 diagnostic modes;
- Eliminates crashes;
- Displays unstable areas;
- Hides defects;
- Estimates media performance.
It is one of the best to date. It is able to solve problems with bad sectors and quickly bring any type of hard drive into working condition.
HDD Regenerator

One of the most effective programs for assessing the status and troubleshooting drives. It makes it possible to obtain information about the current SMART status of the selected device and full control over it.
Among the main possibilities are:
- Simple and clear interface;
- Complete security;
- Support for NTFS and FAT;
- Pre-scan mode;
Real-time HDD monitoring;
That is, with the help of the regenerator, you can test the hard drive as efficiently as possible.
Test Disk
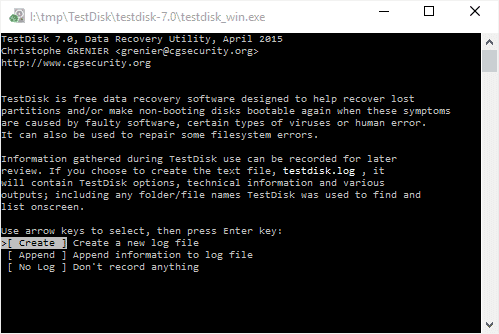
Designed to determine the status and test drives. In addition to simple diagnostics, it also detects bad sectors and fixes any errors found. Its main features include:
- Perform an analysis of the current state of the hard drive;
- Search for bad sectors;
- Recovery of deleted partitions;
- MFT fix;
Checking external hard drives;
In addition, the utility has a number of other functions that are associated with the recovery of deleted files.
Hitachi Drive Fitness Test

An excellent program designed to find and fix problems on drives. It is universal, since any drive can be diagnosed. With its help, you can very quickly find out the current position of the hard drive, as well as get information about it. Additional information.
Includes:
- A quick but thorough check;
- Support for all components;
- Monitoring;
- data statistics;
This utility is suitable for all devices and can be used even on a netbook.
Seagate Seatools for Windows

Used to check and test the status of the hard drive. She finds any problems and failures.
- The utility is able to fix:
- Hardware incompatibility;
- Violations of the HDD file system;
- Errors in installed drivers;
- Viruses and malware that infect the file system;
In addition, it provides complete information about the media and all related indicators. According to the developers, this utility is incredibly effective at self-correction of minor problems, SSD and HDD errors, and is able to fully restore their performance.
So now you have complete information Learn how to determine if your hard drive is working properly and how to troubleshoot hard drive problems yourself. Choose the most suitable or the option you like and act!
Video: checking hard with standard tools