Users who have at least once been involved in setting up the BIOS have probably already noticed that there is an incomprehensible Intel Hyper Threading parameter there. Many do not know what this technology is and for what purpose it is used. Let's try to figure out what Hyper Threading is and how you can enable the use of this support. We will also try to figure out what advantages this setting provides for the computer's operation. In principle, there is nothing difficult to understand here.
Intel Hyper Threading: What Is It?
If you do not go deep into the jungle of computer terminology, but express yourself simple language, then this technology was developed in order to increase the flow of instructions processed simultaneously by the central processor. Modern processor chips, as a rule, use only 70% of the available computing power. The rest remains, so to speak, in reserve. As far as processing the data stream is concerned, in most cases only one stream is used, despite the fact that the system uses a multi-core processor.
Basic principles of work
In order to increase the capabilities of the CPU, a special Hyper Threading technology has been developed. This technology makes it easy to split one command stream into two. It is also possible to add a second stream to the existing one. Only such a stream is virtual and does not work at the physical level. This approach can significantly increase processor performance. The whole system, accordingly, starts to work faster. The performance gain of the central processor can fluctuate quite a lot. This will be discussed separately. However, the developers of the Hyper Threading technology themselves claim that it does not reach a full-fledged core. In some cases, the use of this technology is one hundred percent justified. If you know the essence of Hyper Threading processors, then the result will not keep you waiting long.
Historical reference
Let's plunge a little into the history of this development. Hyper Threading support first appeared only in Intel processors Pentium 4. Later, the implementation of this technology was continued in the series Intel Core iX (X here stands for processor series). It should be noted that for some reason it is absent in the line of Core 2 processor chips. True, then the performance gain was rather weak: somewhere at the level of 15-20%. This indicated that the processor did not have the necessary processing power, and the created technology was practically ahead of its time. Today, almost all modern chips have support for Hyper Threading technology. To increase the power of the central processor, the process itself uses only 5% of the crystal surface, while leaving room for processing commands and data.
Conflict and performance issue
All this is of course good, but when processing data, in some cases, slowdowns can be observed. This is largely due to the so-called branch prediction engine and insufficient cache size when it is constantly reloaded. If we talk about the main module, then in this case the situation develops so that in some cases the first thread may require data from the second, which may not be processed at that moment or are in the queue for processing. Also, situations are no less common when the central processor core has a very serious load, and the main module, despite this, continues to send data to it. Some programs and applications, for example, resource-intensive online games, can seriously slow down only because they are not optimized for the use of Hyper Threading technology. So what happens with games? The user's computer system, for its part, tries to optimize the data flows from the application to the server. The problem is that the game does not know how to independently distribute data streams, dumping everything in one heap. By and large, it may simply not be designed for this. Sometimes in dual-core processors, the performance gain is significantly higher than in 4-core processors. The latter simply do not have enough computing power.
How to enable Hyper Threading in BIOS?
We have already figured out a little about what Hyper Threading technology is and got acquainted with the history of its development. We've come close to understanding what Hyper Threading technology is. How to activate this technology for use in the processor? Everything is done quite simply here. The BIOS management subsystem must be used. The entrance to the subsystem is carried out using the keys Del, F1, F2, F3, F8, F12, F2 + Del, etc. If you are using a Sony Vaio laptop, then a specific input is provided for them using the dedicated ASSIST key. In the BIOS settings, if the processor you are using supports Hyper Threading Technology, there must be a special setting line. In most cases, it looks like Hyper Threading Technology, and sometimes it looks like Function. Depending on the developer of the subsystem and the BIOS version, the setting of this parameter can be contained either in the main menu or in the advanced settings. To use this technology, you must enter the parameters menu and set the value to Enabled. After that, it is necessary to save the changes made and reboot the system.
Why is Hyper Threading Technology useful?
In conclusion, I would like to talk about the advantages of using Hyper Threading technology. What is all this for? Why is it necessary to increase the processor power when processing information? Those users who work with resource-intensive applications and programs do not need to explain anything. Many people probably know that graphic, mathematical, design software packages in the process require a lot of system resources. Because of this, the entire system is loaded so much that it starts to slow down terribly. To prevent this from happening, it is recommended to enable Hyper Threading support.
Virtualization technology allows one physical computer to create several virtual ones with their own operating systems. The guest OS will use the real PC resources allocated to it within the specified limits. In this case, there is no need to partition the disk and there is no danger of damaging the bootloader. The user's personal data is not affected and is safe. If you are interested in these opportunities, stay with us. Today we are going to show you how to enable virtualization in Windows 10.
A Microsoft-developed hypervisor called Hyper-V is included as an add-on to the system. It can be used only in x64 bit OS Windows 10 Enterprise or Pro. In a corporate environment, Microsoft even recommends specific HP and Lenovo laptops. This option is not available to users of the "Home" edition and all x32 bit systems.
- Quickly find out the parameters installed Windows you can use the keyboard shortcut Win + X. In the expanded menu, select the item marked with a frame.

- The window that opens contains two blocks of information. In the first, we look at the amount of installed memory and bit depth. Hyper V requires at least 4 Gb RAM. In the second block, we pay attention to the OS release.

- According to the system parameters, the computer is suitable for installing and running Microsoft VMs. Additionally, Hyper-V requires the processor to support nested SLAT paging. Intel has implemented it in the Core i3 / 5/7 line, and AMD since the first 64-bit Opterons. The processor model is indicated in the characteristics of the device, so there is no need to check it in BIOS or UEFI. We will be able to make sure that Hyper technology is supported using the command line. We enter the command "systeminfo" and look for the data block indicated in the screenshot.

As you can see, all necessary requirements completed and we performed the check without access to the BIOS. After making sure that the hardware configuration is suitable for using the virtual machine, we can proceed to the installation.
Installation
Hyper-V is a component of the operating system. It cannot be downloaded and installed separately. You can only enable use in Windows environment... Consider several connection options Microsoft Virtual Machine.
Graphics mode
Let's start with using the graphical mode, as the most familiar to users.
- Using the Win + R keyboard shortcut, open the Run dialog box and enter the control command in the text field as shown in the screenshot.

- The result of our actions will be the appearance of the classic Windows control panel. We are looking for the specified item and open it.

- In this window, we will use the navigation menu, which is responsible for working with the components of the operating system.

- Turn on Hyper-V. Expand the "Hyper" branch and make sure that the checkboxes are set in front of all its components. We finish the work in this section by clicking the "OK" button.

- Windows searches and installs ordered components internally.

- After completing the changes to the software configuration, the system will prompt you to reboot.

This completes the installation and the PC is ready to use the built-in virtualization tools.
Command line
You can also install hypervisor components using command line capabilities.
- Open the Power User menu and launch PowerShell or CMD shell as administrator.

- Enter the following line in the window that opens:

- Windows processes the received command to install additional components.

- Finally, we will be prompted to confirm the changes and reboot. We enter the English letter "Y" in any case.

The computer will immediately exit graphics mode and display the standard update window. The system starts with Hyper-V enabled.
The latter method involves using the Windows Image Deployment and Management Tool.
- Launch command line with administrative rights. We enter the following line:

- After completing the component installation, DISM asks for confirmation.

Typing the letter "Y" causes the PC to restart immediately, during which the initial Hyper-V configuration is performed.
Using
Once the installation is complete, you can start creating a new virtual machine.
- The new component is located in the "Administration Tools" section of the "Start" menu.

- Hyper-V Manager is a standard Windows management console. Operations are enabled and configured in the Action area. We select the marked item to start the wizard.

- A three-item selection menu expands. Select the one indicated by the frame.

- The first window is informational. By putting a check mark in the indicated place, you will no longer see it on subsequent launches. To create a car with your own configuration, select the button marked with a frame.

- Here we set the name of the created machine and can change the storage location of its files.

- The generation should be selected based on the bit capacity expected to install the OS. For 32-bit versions we leave the former, while modern distributions belong to the latter.

- The size of the allocated memory depends on the physical capabilities of the PC. The most simple solution there will be an allocation of 2 GB (2048 MB). This is the minimum space required to run 64-bit Windows. It is enough to install any version of Linux.

- In the network settings, open the drop-down menu and select the specified parameter. VM Manager will automatically configure a connection for the virtual machine using the current Internet connection.

- The size of the disk that will be used for installation can be limited to 32 GB. This is enough to run a guest OS with a set of programs.

- We will agree with the proposal to install the guest system later. This can be done using DVD media or ISO image.

The virtual machine is ready. To disable Hyper-V and remove guest systems, you must deselect the use of this Windows component in Control Panel.
Alternative
Windows Home owners who don't have Hyper-V access can use a free alternative solution from Oracle. Unlike the product Microsoft application VirtualBox runs on 32-bit systems, has more features and is less resource intensive. It does not require a special set of processor instructions.
Almost all existing operating systems will run in VirtualBox, which cannot be said about Hyper-V. In it, the choice is limited to a few versions of Windows, and more recently also Linux.

Finally
For comfortable use virtual machines do not forget that they use up the physical resources of the computer. Ideally, the PC should have 8 GB of memory to allow the current and guest OS to run concurrently with applications running.
Video
To help users who want to better understand the Windows 10 virtualization settings, below are the video links.
Hyper-V is an operating system component that is disabled by default. To include a component Hyper-V production 64-bit processor required Intel or AMD with support for NX and SSE2 instructions. The processor must support virtualization technologies ( Intel VT-x or AMD-V), as well as Second Level Address Translation (SLAT) technology. You can check the processor for the presence of the necessary technologies using the Coreinfo utility from Sysinternals, the verification procedure is described in detail
Also, before enabling Hyper-V, you need to check if these technologies are enabled in BIOS / UEFI.
graphical interface
To enable the Hyper-V component in the graphical interface, press the key combination + R and in the window that opens, enter OptionalFeatures and press the key Enter↵
In the opened window Windows components find item Hyper-V... In addition to the Hyper-V platform itself, this includes tools for its management - graphical snap-in Hyper-V Manager and module Hyper-V for PowerShell... We open it, mark all the components and press the button OK
To disable Hyper-V, uncheck the box next to Hyper-V

You must restart your computer to complete the installation and make the requested changes.
Enable or disable Hyper-V using
Windows PowerShell
Hyper-V component can be enabled using Windows PowerShell console
As administrator and run the following command:
Enable-WindowsOptionalFeature -Online -FeatureName Microsoft-Hyper-V –All

Y
To disable the Hyper-V component using Windows PowerShell, run the command:
Disable-WindowsOptionalFeature -Online -FeatureName Microsoft-Hyper-V-All

To complete the operation, restart Windows by pressing the key Y
Enable or disable Hyper-V using DISM
To enable the Hyper-V component using DISM, run Command Prompt as administrator and run the command:
dism.exe / Online / Enable-Feature: Microsoft-Hyper-V / All

To complete the operation, restart Windows by pressing the key Y
To disable the Hyper-V component using> DISM, run Command Prompt as administrator and run the command:
dism.exe / Online / Disable-Feature: Microsoft-Hyper-V-All

To complete the operation, restart Windows by pressing the key Y
A virtualization server is a physical computer that has the necessary resources to run virtual machines. Hyper-V Manager lets you create, configure, and manage virtual machines on the virtualization server.
With virtual machines, you can perform a variety of tasks. Each virtual machine runs in an isolated runtime environment, which allows a different operating system and application to run on the computer.
This article will tell you how to enable Hyper-V virtualization in Windows 10. First, let's look at how to check the system requirements for Hyper-V, and only then enable Hyper-V and configure the virtual machine.
So, if we talk about system requirements for operating system, on which a hypervisor called Hyper-V will be deployed, then Windows 10 Enterprise, Professional and Education editions will do. There must be a 64 - bit version of the Windows 10 operating system, since 32 - versions do not have the ability to use Hyper-V.
In addition, you need a 64 - bit processor that supports virtualization technologies such as VM Monitor Mode Extension and Second Level Address Translation support. Recommended to use at least 4 GB random access memory if you run it on a smaller volume, then the virtual machine won't get anything.
And you will also need to enable these same virtualization technologies, as well as enable Hardware Enforced Data Execution Prevention (DEP). Without this technology, your virtual machines will not start. There are a number of features associated with a specific BIOS or UEFI model. Some technologies can compete with virtualization and therefore prevent virtual machines from running.
Operating Windows system 10 has a tool for checking hardware compatibility with a Hyper-V installation, which is useful for newbies. Using the systeminfo.exe utility, we will see the parameters for the Hyper-V requirements.
At the bottom of the window, we find the item Hyper-V requirements and check whether the installation of a virtual machine is supported on your computer. If you find the following parameter values, then you will not have problems installing Hyper-V on this machine:
- VM Monitor Mode Extensions: Yes
- Virtualization Enabled in Firmware: Yes
- Second level address translation: Yes
- Data Execution Prevention Available: Yes
How to enable Hyper-V on Windows 10
Control Panel

The components will be installed quickly enough and the system will ask you to reboot the system. During the reboot process, the user will also see the updates work.
Windows PowerShell
Installing and configuring Hyper-V
The wizard will help you create a virtual machine. Virtual machines can be used instead of physical computers for different purposes. You can configure the virtual machine using a wizard or using Hyper-V Manager.
Before creating a virtual machine in Hyper-V, you need to download an operating system image. It can be easy.
- Open the Hyper-V Manager, which appeared in the system after enabling the Hyper-V hypervisor component.
- Right-click on your device in the Hyper-V manager and in context menu select item Create> Virtual Machine ...

- In the opened window of the virtual machine creation wizard, click the button Further to create a virtual machine with specific configuration options.

- We set a name and location for this virtual machine and click Further(the values of the current window can be left by default if you have enough memory on the system disk).

- Depending on the bitness of the operating system that we will install on the virtual machine, select the generation (the generation of the virtual machine you selected cannot be changed after creation).

- Next, specify how much RAM you need to allocate for this virtual machine (when deciding on the amount of memory allocated to a virtual machine, you should take into account the purposes for which it will be used).

- Select the virtual switch from the available connections, or leave network adapter virtual machine unconnected.

- Now let's create a virtual HDD specifying its name, location and size (we recommend freeing up memory on your hard disk in advance).

- Next, in the installation parameters, select the item Install operating system from file boot image
and specify the desired operating system image.

- The last step of creating a virtual machine will be to check all the above parameters in the tab Summary and pressing the button Done.

- Now in the Hyper-V manager it is enough to start the created virtual machine by selecting the item Start in the context menu and connect to it by selecting the item To plug.

After connecting to the new virtual machine, a new window will open with the image that was selected earlier. Then it is enough to manage and follow the steps of installing the operating system.

Conclusion
You can enable Hyper-V virtualization on Windows 10 using the New Virtual Machine Wizard in Hyper-V Manager. But before turning on, make sure your computer is responding. system requirements Hyper-V. Only then is it recommended to enable, install and configure the virtual machine in Hyper-V.
Users of OS such as Windows 10 Pro or Enterprise, perhaps not aware that these versions have built-in VM support Hyper-V... This means that the PC has everything you need to install any OS on a virtual machine (VM).
Ordinary users probably have no idea what a VM is and what it is used for. " Virtual machine", In fact, this is a separately launched PC with any OS, which has its own installed system settings, files, local drives etc. This is what a VM window looks like on Windows 10.
As well as on a usual operating system familiar to all, you can install on a VM various programs, OS, experiment with content, and, which is very convenient, the main OS will not be affected by this. You can even run a virus, but nothing happens to the main OS. Moreover, you can save the current state of your virtual OS by taking a "snapshot" that will help you return it to the state you need.
Its main purpose for an ordinary user can be: testing programs that do not work on your operating system, the ability to install any OS without changing the current one, or use a VM as a server for any of your tasks. These are, of course, not all methods of using them.
The main thing to understand is that the main Windows 10, like and similar VMs, consume the memory of one PC, so it is important that the computer is quite powerful.
If you are wondering how to install a virtual machine, you just need to follow the instructions. There is nothing complicated here, everything is intuitively clear, especially since there is plenty of information about it now.
Standard virtual machine
Previously, the use of the hypervisor was limited to use only in server operating systems. The virtual machine was named Hyper-V, because it is based on a hypervisor that supports virtualization for 64-bit OS. This technology allows you to generate a virtual machine for installing almost any operating system into it.
Hyper-V intended only for 64-bit Windows versions 8, 10 Pro and Enterprise, and for server OS. The user of these versions no longer needs to install additional virtualization programs on the PC, such as VirtualBox.
It is worth noting that the hypervisor was originally created only for server operating systems, so the possibilities Hyper-V in Windows 10 are a little limited:
- sound cards are not supported;
- you cannot directly copy and paste files from a virtual OS to a real one and vice versa;
- there is no CD / DVD recording capability.
You should be aware that if your computer is rather weak, then you should not even install this VM, as it requires quite a lot of memory for optimal operation. When using a virtual OS, do not use resource-intensive applications in order to avoid slowing down the computer.
Enabling Hyper-V
Earlier it was said that Windows 10 has built-in support for VMs Hyper-V... True, in this OS, its components are disabled. To do this, let's figure out how to enable Hyper.
In order to use the services of a VM, you need to enable the components Hyper-V:

Some components may be inactive. Presumably due to the fact that your OS is 32-bit or your PC has less than 4 GB of RAM, or virtualization is not supported, although almost every modern PC or laptop has it.
The installation is complete and now you need to open "" through the search.

In Windows 10, it is located under " Administration Tools».

VM preparation
This requires:

Now you should install the VM and install Windows OS into it. In principle, it is possible to install Linux, although in the opinion of many experienced and advanced users, its performance in Hyper-V terrible, so the best choice should be VirtualBox.
Installing a virtual machine on Windows 10
To put the VM Hyper-V a number of simple steps are required:

The VM is now created and can be seen in the Hyper-V virtual machine management list.
The photo shows how virtual machines are managed.

We start the virtual machine
It is easy to start the newly created VM, simply by clicking on it 2 times or by clicking " Enable". When creating, you must indicate that the download will go with ISO image or disk to immediately install the OS. If the image was not specified, then this is done in the line “ Media»Connecting to the VM.
As a rule, after installation, the VM is booted from the virtual HDD, as this happens automatically. You can also configure the download if it does not go as needed from the HDD. To do this, move the mouse cursor over the name of the VM in the Hyper manager, press the right mouse button, then select the line “ Parameters…", Followed by the line" BIOS».

Even in the settings, you can change the size of the allocated RAM, the number of virtual processors, add additional HDDs and change the rest of the VM settings.
It is clear that this algorithm is short and cannot completely fit all aspects and features of the process of creating and installing virtual machines V in Windows 10. Close attention should be paid to the following points: creating restore points, connecting physical disks to the OS, installed in the VM, and so Further.
Exporting a Hyper-V virtual machine
The export takes place in the background and is not fast, as it takes up a small amount of system resources and, thus, allows you to work with the VM in peace.
Let's see how to export a virtual machine:

Let's figure it out: how to install Windows 10 on VirtualBox
Installing Windows 10 on VirtualBox does not affect the operation of the main OS, recovery system and programs. It should be said that there are disadvantages: it is difficult to use all the capabilities of the hardware and relatively poor performance... Installing Windows 10 on a virtual machine for evaluation does not require large resources and, therefore, these disadvantages are not at all critical.
Several companies produce software for virtualization. Our needs are fully satisfied free program from a well-known organization Oracle - VirtualBox... You need to download and install new version product. And it will take Windows images 10.
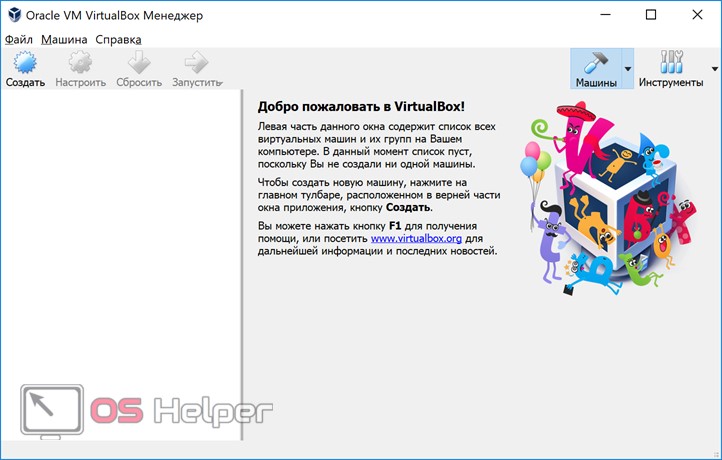
Installing the VirtualBox utility
In order to install VirtualBox, consider the sequence of actions:

So, we have successfully installed the virtual machine on Windows 10, now all that remains is to configure it.
Setting up a virtual machine
Consider the setup procedure:

The VM settings process is complete, let's start.

How to install Windows 8 on a virtual machine
Such an installation is done in the same way as for the case with Windows 10.
Outcome
Thus, in this article we tried to tell you in more detail how to install Hyper-V on Windows 10, and how to install Windows 10 on a virtual VirtualBox machine... Now with the help of these machines it is possible to solve any tasks that were impossible or dangerous to carry out on the main operating system.
Related Videos