Greetings to all readers.
Majority computer games(even those that came out 10 years ago) support multiplayer games: either over the Internet or over a local network. This, of course, is good, if not for one “but” - in many cases, connect to each other without using third party programs- it won't work out.
There are many reasons for this:
For example, the game does not support playing over the Internet, but there is support for local mode. In this case, you must first organize such a network between two (or more) computers on the Internet, and then start the game;
Lack of a “white” IP address. It's more about organizing Internet access by your provider. Often in this case it is impossible to do without using software at all;
The inconvenience of constantly changing the IP address. Many users have a dynamic IP address that is constantly changing. So, in many games you need to specify the IP address of the server, and if the IP changes, you have to constantly enter new numbers. To avoid this, special tools will come in handy. programs...
In fact, we’ll talk about such programs in this article.
GameRanger
Supports all popular Windows versions: XP, Vista, 7, 8 (32/64 bits)
GameRanger is one of the most popular programs for playing games on the Internet. Supports all the most popular games, among them there are all the hits that I simply could not help but mention in this review:
Age of Empires ( The Rise of Rome, II, The Conquerors, Age of Kings, III), Age of Mythology, Call of Duty 4, Command & Conquer Generals, Diablo II, FIFA, Heroes 3, Starcraft, Stronghold, Warcraft III.
In addition, there is simply a huge community of players from all over the World: more than 20,000 - 30,0000 users online (even in the morning/night hours); about 1000 created games (rooms).
During installation of the program, you will need to register by indicating your work email (this is mandatory, you will need to confirm your registration, and if you forget your password, you will not be able to recover your account).
After the first launch, GameRanger will automatically find everything installed games on your PC and you can see games created by other users.
By the way, it is very convenient to look at the server ping (marked with green bars:): the more green bars, the better the quality of the game will be (less lags and errors).
IN free version program, you can add 50 friends to your bookmarks - then you will always know who is online and when.
Works in: Windows XP, 7, 8 (32+64 bits)
A rapidly gaining popularity program for organizing online games. The principle of operation is somewhat different from GameRanger: if you go into a created room there, and then the server starts the game; then here each game already has its own rooms for 256 players - each player can launch their own copy of the game, and the rest can connect to it as if they were on the same local network. Comfortable!
By the way, the program contains all the most popular (and not popular) games, for example, here’s a screenshot of the strategies:
Thanks to such room lists, you can easily find friends for many games. By the way, the program remembers “your rooms” that you entered. In each room, in addition, there is a good chat that allows you to negotiate with all the players on the network.
Result: a good alternative to GameRanger (and perhaps soon GameRanger will be an alternative to Tungle, because Tungle is already used by more than 7 million players around the world!).
Of. website: http://www.langamepp.com/langame/
Full Windows support XP, 7
This program was once unique in its kind: nothing simpler and faster to set up could simply be found. LanGame allows people from different networks to play games where such an option is not provided. And for this you don’t need an Internet connection!
Well, for example, you and your friends are connected to the Internet through the same provider, but in online game mode, you cannot see each other. What to do?
Install LanGame on all computers, then add each other’s IP addresses to the program (don’t forget to turn off Windows firewall) - then all that remains is to launch the game and try to turn on the online game mode again. Oddly enough - the game will start multiplayer mode - i.e. you will see each other!
Although, with the development of high-speed Internet, this program is losing its relevance (because even with players from other cities you can play with a very low ping, despite the lack of a local connection) - and yet, in narrow circles it can still be popular for a long time.
Hamachi
Works in Windows XP, 7, 8 (32+64 bits)
Hamachi was once a very popular program for organizing a local network over the Internet, used in many games for multiplayer mode. Moreover, there were very few worthy competitors.
Today, Hamachi is more needed as an “insurance” program: not all games are supported by GameRanger or Tungle. Sometimes, some games are so “capricious” due to the lack of a “white” IP address or the presence of NAT devices - that there are simply no alternatives to playing through Hamachi!
Overall, simple and reliable program, which will be relevant for a long time. Recommended for all fans of rare games and those connected to the Internet through “problematic” providers.
Alternative programs for playing online
Yes, of course, my list of 4 programs above did not include many popular programs. However, I was based, firstly, on those programs with which I had experience working, and, secondly, in many of them the online players are too small to consider them seriously.
For example, GameArcade- a popular program, however, in my opinion, its popularity has been falling for a long time. There is simply no one to play with in many games; the rooms stand empty. Although, for hits and popular games the picture is somewhat different.
Garena- also a fairly popular program for playing on the Internet. True, the number of supported games is not so large (at least in my repeated tests - many games could not be launched. It is possible that now the situation has changed for the better). As for hit games, the program has gathered a fairly large community (Warcraft 3, Call of Duty, Counter Strike etc.).
That's all, I will be grateful for interesting additions...
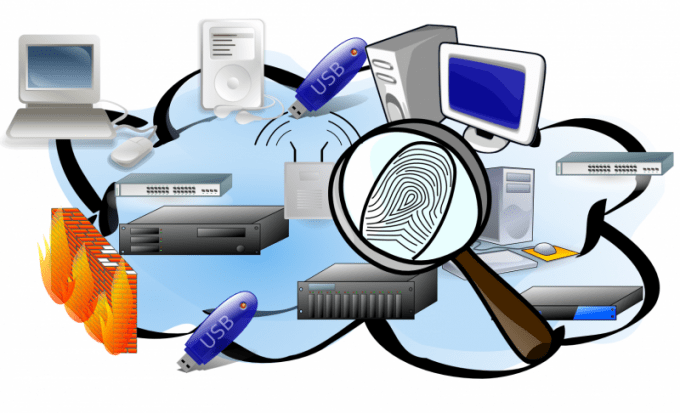
We continue to consider home low-current networks. In this article I want to touch on a very relevant topic today - local computer network at home.
We are surrounded by more and more devices that can connect to a local computer network or the global Internet. Let's look at how to organize the connection of several computers or devices to a local network. How to organize Internet access over a local network so that every device connected to the network can access global network Internet. We will also look at how to create a wireless local network using Wi-Fi.
Local network between computers
In order to connect several computers into a local network, a special device is used - switch (switch).
The switch has several connectors - ports, to which using a special cable twisted pair UTP-5e connects computers or other devices. The twisted pair is crimped on both sides with special RJ-45 connectors. This wired connection technology is called Ethernet.
Internet connection via local network
There is a concept local computer LAN networks , it is internal, we discussed how to create it above. There is also global computer network WAN, she is external.
Let's look at how to connect devices connected to our local network to the global Internet. So that from each individual device of our ( desktop computer, laptop, network media player, TV) we could have access through our Internet provider to the global Internet.
For this purpose, a special device is used - router (router).
The router has a separate WAN port, to which a twisted pair cable from the Internet provider is connected. Through this port, our local network is connected to the global Internet.
Also, depending on the model, the router has several LAN ports for connecting local network devices. Usually these are four or more ports.
In general, one router is enough to create a local network and organize its access to the Internet. If there are not enough ports to connect devices on the internal LAN network, then you must additionally use a switch.
In the figure below, I just showed the option when some devices are connected through a router, and some through a switch.
The cable from the Internet provider is connected to the WAN port of the router. Our router has four ports to connect four LAN devices.
We want to connect:
Three computers; - network storage NAS; - TV with Internet connection; - maybe something else in the future.
We connect the all-in-one computer and the network drive to the LAN ports of the router, leave one port as a backup for the future, and connect the remaining free port with a twisted pair cable to a free port on the switch.
We connect a desktop computer, laptop and TV to the free ports of the switch.
If you need to connect several more devices to the local network, but there are not enough free ports on the switch, add another switch and connect these devices to it. This option can be useful when organizing a local computer network in a cottage, when a separate switch can be installed on each floor.
I would like to note that in our example, you can purchase a router with a larger number of ports and connect all local network devices to it. Then a switch is not needed.
This configuration using a router will allow each device connected to the local network to access the Internet via one channel from the Internet provider.
Wireless LAN via Wi-Fi
Above, we looked at the topology of constructing a wired local network. But today more and more devices are appearing with the ability to connect to the network via wireless technology Wi-Fi. First of all, these are tablets and smartphones. How to create a local network via Wi-Fi? To do this, you need to connect a special device to a free port of our router or switch using a compressed twisted pair - Wi-Fi hotspot.
It will allow you to exchange information between all devices connected to the local network both via wired Ethernet technology and via wireless wifi. In addition, we get the opportunity to access the Internet from our tablets and smartphones.
If Wi-Fi coverage is not enough, you can expand it by adding another access point.
Recently, they have become widespread in apartments and small offices. Wi-Fi router s, they combine a router and a wireless access point in one package. I discussed in detail how to create a local Wi-Fi router network in the video, and I also looked at several more schemes for creating a local network that are not discussed in this article.
Watch the video: Local network at home via the Internet
The following publications will be devoted to the architecture (circuits and layout) of an apartment low-current switchboard, including a computer network. What is installed where, what cables are pulled where, what equipment is used. Therefore, I recommend subscribing to the newsletter, there is a lot of interesting things ahead! Subscription form at the bottom of the article.
How to connect several computers to each other and to the Internet, distributing the same speed to the Internet? Through such connections, you can not only use files located on another PC, the Internet, but also printers that are connected to any link of this network. Let's try to consider all the options for setting up a local network, from the simplest to the most complex.
Let us divide the sequence of actions into two stages.
First, let’s analyze and discard the option when you only need to divide the Internet.
Connecting 2 or more computers to the Internet in one apartment without creating a local network
There are several ways to solve this issue:
- Installing a router (router)- allows each computer to have access to the Internet without connecting the second one to the network. Since the IP address (identification details of a computer on the network) is assigned directly to the router, you will have one tariff for the provision of Internet services, and the Internet can be used by two computers at once.
- Wi-fi technology - wireless connection to the network. It is possible when using a special set of equipment and its configuration.
1st stage. Setting up a local network
How to connect two computers to a network (Network Bridge)
One of the computers connects to the Internet, the second computer connects to the first. The main disadvantage in this case is that in order for the second computer to connect to the network, the first computer must also be on the network. And also, if your connection to the Internet is via a network card, then you need an additional network card to connect the second computer to the first, because the built-in network card is already occupied (it receives the Internet).
To connect two computers to each other and to the Internet via a Network Bridge, you will need:
1. Special cable (twisted pair) and possibly an additional network card.
Twisted pair cables can be obtained at radio markets or in specialized stores. It is made independently, using a special tool called a “crimp” and based on the required length of the cable itself. The pinout can be found on the Internet. Or you can ask to crimp the “vita” directly on the radio market (tell the seller that you need to crimp it for the type of connection “via network cards” or “comp-to-comp”, there is also a “comp-switch”) or buy a ready-made cable (if available), but it may be short. There is no factory-assembled cable like this, there is only a “comp switch” on sale, you can buy it, but then one end is cut off and crimped.
A twisted pair is an 8-core cable (eg UTP-5) with RJ-45 connectors. The ends of the cables are specially crimped. tool (special pliers) into the connectors in accordance with the colors of the ends. Crimping procedure network cable is: BO-O-BZ-S-BS-Z-BK-K on both ends to connect to the hub. To connect a computer to a computer, one of the sides must have: BZ-Z-BO-S-BS-O-BK-K, where O-orange, Z-green, S-blue, K-brown, BO-white-orange, etc. etc. (don’t go into too much detail, but give the cable to knowledgeable people for crimping).
Twisted pair ($2-2.5 - 3 m)

Crimping tool
So, using a “twisted pair” we connect computers card-to-card (computer-to-computer connection type)!

Network card ($3-6)
2. After connecting 2 computers via cable, you need to configure them programmatically.
It is necessary that the computers be in the same workgroup, in the same address range and with different network names. The settings for these parameters are shown in the graphic diagram:

In this case, it is also advisable to set the IP addresses and subnet mask manually (the subnet mask is generated automatically when the IP address is specified). IP addresses can be selected in the range 192.168.0.xxx. In this case, on all computers on the local network, the IP address must begin with “192.168.0.xxx”, and the last three digits (xxx) must be different (otherwise there will be a conflict, since this is equivalent to two different houses having the same same address), and be in the range 0 - 255. The IP address setting is shown in the graphic diagram:

2.2. Setup using the wizard
To do this, go to “Control Panel” -> “Network Setup Wizard” and follow the wizard’s instructions.
Can also be combined manual setting network and configuration using the wizard, for example, after setting up the network using the wizard, specify the IP address.
After all this, you can give access (share) to some folders in the folder properties, in the “Access” tab. You can see shared folders by going to “My Computer” and selecting “Network Neighborhood” in the “List of Common Tasks”. Or, through Total Commander, go to “Network and Plugins” (disk button on the far right) -> “Entire Network” -> “Microsoft Windows Network”.
3. Setting up the printer.
3.1. Providing public access to the printer via local network
To do this, go to Start - Control Panel - Printers and Faxes. Find the printer connected to this PC, right-click on it and select “Sharing...” in the context menu. After this, this printer will automatically be detected on other PCs connected to this local network.
3.2. Using a shared printer on your local network
On other PCs, go to Start - Control Panel - Printers and Faxes. Click on “Install a printer”, and then follow the instructions of the printer installation wizard.

I. Select “Network printer or printer connected to another computer”
Let's move on to the next stage.
II. We put a choice on “Browse printers”
We review printers on the local network.

III. If you plan to use this printer frequently or constantly, set it to “Use this printer as default?” - “Yes.”
This completes the setup.
We connect 3 PCs via network cards using the Network Bridge type
It is not necessary to have a router or switch to connect 3 PCs; it is enough to buy another network card.
This option is cheaper than a switch, because switch is 3 times more expensive network card. To connect 3 computers, you need to select one of them and make it the master, the other two slaves. You need to install 2 network cards on the host computer. Then connect with 2 other twisted pairs and create Network Bridge. Then share the Internet and local folders, while the slave computer must be constantly turned on and connected to the Internet.
We connect 3 or more computers (up to 20 PCs) via an external hub (switch or network hub)
How to connect 3 or more computers to each other and to the Internet, provided that you need to distribute the same speed to each?

The simplest solution is to buy a switch (Hab), with 5 or more ports, N cables (taking into account the distance of each from the expected location of the switch to each computer) with a computer-switch crimp (this has already been discussed above), where N is the number computers. After purchasing what you need, you need to connect the computers to the switch. After this, we configure the computers in the same way as with a connection between two computers.
We connect 3 or more computers (up to 6 PCs) via an internal hub (Hub)
We create a local network using an internal 5-port 100 Mbit hub
This option is perfect for organizing a network for home and small office (up to 6 computers), using a hub (or, as they also say, hub), for example, Genius GF4050C. The advantage of this PCI hub is that it is installed inside the computer like a regular expansion card. And for very little money ($45) you will get a 100 Megabit high-speed network in your office. But you should take into account that when you turn off the server (the PC where the hub is installed), the network will not work. However, the hub does not require an extra power outlet and does not take up space on the desk.

Internal hub
We connect 5-20 or more PCs through the Central PC Server
We create a network with a central server computer that serves as a switch.
This option is designed for large offices and corporate organizations. More than 20 PCs can be connected to each other. The central server computer with some server OS installed on it, for example, FreeBSD + switch, serves as a hub.
After the number of computers in the local area exceeds 20, you need to abandon the switch (hub) and install a central server, because With so many PCs, data transfer will slow down the computer. This occurs due to the extra load on the processor when transmitting/receiving data, since a lot of processing has to be done, for example, when a movie is downloaded (resources are spent on creating packets where the data is read, and parsing packets where the data is received). All this leads to a slowdown in the performance of both computers: the one who reads and, most of all, the one where the data is read. If it costs central. server, then it is he who is engaged in this matter, and not the client computers. That is why they install a central server. The switch takes on some of the processing, but this is not enough if there are a large number of PCs connected to the network.
But it is better, of course, to use a server with fewer computers, and there will be no slowdown, but in this case, you need to spend extra money on a server, i.e. to another PC. In addition, the server must be serviced by someone, for this there is such a position as " System administrator". In general, if there is no money for an additional computer, you can connect up to 20 computers through a switch.
A local network server (Fig. 1.1) is a server that provides services to users of the Intranet network. Do not confuse “Intranet” with “Internet”. An Intranet is an internal corporate network, usually without Internet access.
Imagine a small office network. If you have a strong imagination, you can even imagine a large local area network located in a multi-story building. In such a network, a server can perform a wide variety of functions, for example, be a print server or a file server. Typically, on internal networks, servers perform only these functions. Depending on the type of activity of the organization in which the server is installed, quite often it is used as a database server.
For database server and file server in general, it is advisable to allocate one computer at a time, because if the load on the database server is quite large, and this is the case in most cases, then this will reduce the performance of the file server, and vice versa. If the server performance is poor, then, as always, the user suffers. In turn, the “suffering” of users will affect no one other than you, the administrator.
Rice. 1.1. LAN Server
In Fig. Figure 1.1 shows a small local network without Internet access. All workstations and the server itself are connected to central device network - hub. Instead of a hub, you can use (and it is preferable to use) a switch. Unlike a switch, a hub does not “know” which port a particular computer is connected to, and when one of the computers transmits a data packet, the hub repeats it to all its ports. Each computer on the network receives this packet and checks for its IP address in its header. If the destination IP address does not match the IP address of the computer that received the packet, then the packet is simply ignored. The switch transmits the packet only to the port to which the recipient is connected. Thanks to this, in addition to increasing security, the load on the network is reduced. This is how data packets are delivered from source to destination.
Apart from a hub or switch, in most cases no other network equipment is needed, with the possible exception of network cards. In the case of a long network, repeaters are used, which, passing the signal through themselves, amplify it. At its core, a repeater is a simple hub. The hub, minus some service functions, is a multiport repeater.
About choosing a network adapter and other hardware for the server is written in paragraph 7.6 “A few words before setting up the server.” Here you need to say a few words about choosing a switch. Previously, the main stumbling block to using switches was their high cost. Nowadays you can buy quite powerful switches for relatively little money. For a home or small office, we can recommend the LUCENT CAJUN P115G switch. It has 24 10/100Mb ports as well as 1 100FX fiber port. According to the latest data, its cost is about 230 US dollars.
A more expensive and more productive option for 48 ports 10/100 Mbit LUCENT-CAJUN P334T. This switch has an internal 8 Gbps bus and a modular design that allows you to install additional modules. The cost of the P334T model is about $900. When installing additional 100FX fiber optic ports, the cost will increase by approximately $150...250 depending on the number of ports.
Instructions
Start creating such a network by selecting a server computer. It must be powerful enough to process information flows passing through it to other computers or laptops. Another important requirement is the presence of a second network adapter.
Connect the Internet connection cable to the selected computer. Set up Internet access for this device.
Buy a network hub (switch). It is necessary in order to ensure the connection of other computers or laptops with the computer - server.
Now you need to configure the control computer. In Control Panel, open the Network and Connections folder. Internet" Right-click on the “external” adapter icon to bring up the drop-down menu. Select the “Properties” option and go to the “Advanced” tab. Check the “Allow others to use the connection...” checkbox. If you consider it necessary, allow other users to manage sharing by checking the appropriate box. Click OK.
Answer “Yes” to the warning about changing the IP address. The "internal" network adapter that connects the control computer to net yu, will be assigned static network address 192.168.1.1. If one of the computers within the network plays the role of an FTP or WEB server, in the “Sharing” section, activate the “Settings” button. In the list of services, select the protocols that will be used within the network.
If you want to create your own service, click Add. In the new window, enter a description of the service, the IP address or name of the computer on which it will run, the port numbers, and the protocol type that will be used by the service.
The DCHP protocol, running on the control computer, automatically assigns network addresses to computers on the local network. The inconvenience will be that net will not work when the server is turned off. To avoid this, you can manually assign static IP addresses to client computers. Go to Control Panel and open the network connections icon. Right-click on the “Local Area Connection” icon to open the context menu and select the “Properties” option.
In the "Components" section, check "Internet Protocol (TCP/IP)" and activate "Properties". If you decide to set IP addresses manually, select “Use the following IP address.” You can use the address range 192.168.0.2 – 192.168.0.254. The address must be unique for each computer on the network. Assign the subnet mask value to 255.255.255.0. In the “Default gateway” field, enter the server network address 192.168.1.1.
Enter 192.168.1.1 for “Use the following DNS addresses.” Click "Advanced" and go to the DNS tab. In the Connection DNS Suffix field, enter MSHOME.NET. Select the “Register addresses for this connection” checkbox.
Launch Internet Explorer and go to the Tools menu. Select “Internet Options” and go to the “Connections” tab. Click “Install”, then “Next” to continue. Check “Connect to the Internet” and click “Next”. Select “Set up a connection manually” and click “Next” to continue. Specify "Connect via persistent" high speed connection", click "Next" again and on the next screen "Done".
Sources:
- connect internet via network
Local net- This is one of the types of computer networks, limited to a certain territorial area. Usually under local net They mean a set of devices located within certain limits (building, room, etc.).
Instructions
There are local computer networks, which are spread over kilometer areas. Despite the wide range of coverage, they are also considered local due to their specific construction scheme. Most local networks are built using Wi-Fi technologies and Ethernet. It is not advisable to use fiber optic cables within a local network, because ordinary twisted pair cables provide very impressive data transfer speeds over short distances.
To create modern local networks, a variety of equipment is used: network hubs, switches, routers, wireless access points, and so on. Typically, the classification of types of local networks is carried out according to the method of their administration. The type of network you choose depends on how it is managed and the design used to build it.
If routing is used on a local network, its level is usually very primitive. This is due to the fact that private local networks mostly consist of a small number of computers. A person who controls the operation of a local network and corrects errors in it is called a network administrator.
Typically, certain ranges of IP addresses are used within a local network. Internal addresses are used to connect computers with each other within a single local network. They are not available for connection from external computers. DHCP is used to prevent IP address conflicts. It allows a device that links multiple computers into a local net, give each PC a unique IP address.
Instructions
If there are only two computers on your network, you will need a crossover cable to connect them into a network - a twisted pair cable that is connected to RG-45 connectors crosswise at both ends. This connection is necessary so that the connector contacts of one network card, responsible for receiving signals, are connected to the contacts of another network card, responsible for transmission, and vice versa. If there are more than two computers on the network, you will need a hub to connect them into a network. Computers connect to the switch directly. Patch cords, crimped crosswise or directly, are sold in computer stores.
Now you need to configure the control computer. In Control Panel, open the Network and Internet Connections folder. Right-click on the “external” adapter icon to bring up the drop-down menu. Select the “Properties” option and go to the “Advanced” tab. Check the “Allow others to use the connection...” checkbox. If you consider it necessary, allow other users to manage sharing by checking the appropriate box. Click OK.
Answer “Yes” to the warning about changing the IP address. The “internal” network adapter that connects the management computer to the network will be assigned a static network address of 192.168.1.1. If one of the computers within the network plays the role of an FTP or WEB server, in the “Sharing” section, activate the “Options” button. In the list of services, select the protocols that will be used within the network.
If you want to create your own service, click Add. In the new window, enter a description of the service, the IP address or name of the computer on which it will run, the port numbers, and the protocol type that will be used by the service.
The DCHP protocol, running on the control computer, automatically assigns network addresses to computers on the local network. The disadvantage is that the network will not work when the server is turned off. To avoid this, you can manually assign static IP addresses to client computers. Go to the “Control Panel” and open the icon network connections. Click to call context menu Click on the “Local Area Connection” icon with the right mouse button and select the “Properties” option.
In the "Components" section, check "Internet Protocol (TCP/IP)" and activate "Properties". If you decide to set IP addresses manually, select “Use the following IP address.” You can use the address range 192.168.0.2 – 192.168.0.254. The address must be unique for each computer on the network. Assign the subnet mask value to 255.255.255.0. In the “Default gateway” field, enter the server network address 192.168.1.1.
Enter 192.168.1.1 for “Use the following DNS addresses.” Click "Advanced" and go to the DNS tab. In the Connection DNS Suffix field, enter MSHOME.NET. Select the “Register addresses for this connection” checkbox.
Launch your browser Internet Explorer and go to the "Service" menu. Select “Internet Options” and go to the “Connections” tab. Click “Install”, then “Next” to continue. Check “Connect to the Internet” and click “Next”. Select “Set up a connection manually” and click “Next” to continue. Specify “Connect via a persistent high-speed connection”, click “Next” again and on the next screen “Done”.
Why might it be necessary to connect computers located in different places and significantly distant from each other into a local network via the Internet? The reasons may be different. Some people want to play with friends over a local network, others need it for work. For example, we have already considered and discussed the issue of the need to have a “white” static IP address.
In this article we will talk about how to network remote computers in the absence of the possibility of obtaining a static ip and . This can be done using various specialized programs. Let's look at this task using LogMeIn Hamachi as an example.
Installing LogMeIn Hamachi
LogMeIn Hamachi is a simple, small program for creating private virtual networks.
2. Run the installation file
3. Select the installation language, click Next and again Next on the next screen
4. We accept the terms of the license agreement

5. Select installation options. I'll leave the installation path and menu group as default and check the box Create a shortcut on the desktop . Click Install .

6. Wait for the installation to complete. Leave the checkbox Launch Hamachi and press Ready .

7. If you did not uncheck the previous paragraph, the program will start automatically. When you first launch the program, it will automatically check for the need for updates and install them if necessary.
8. Press the power button

9. After a while, a window will appear asking you what type of network to classify Hamachi networks as: home, work or public. I'll choose public.

10. The Hamachi registration window will open. If you have already registered, please provide your details. If not, then go to the tab Registration, enter your address email and create a password. And click Create account (sometimes this inscription is not completely visible).

When registering in the program, a profile is automatically created on the LogMeIn Hamachi website. It can later be used to manage your networks.
The program is installed.
Creating a VLAN via Hamachi
1. To create a network in Hamachi, click on the button Create a new network... or through the menu Net - Create a new network...

2. In the window that appears Networking enter the network identifier (must be unique), set a password to connect to the network and confirm it. Click Create .

3. Our network appears in the main program window. There is no one in it yet. In order for someone else to connect to this network, you need to tell them the network ID (I have spvcomp1) and password.
Connect to an existing network
1. To connect to an already existing network, click on the menu Net - Connect to an existing network...

2. In the window that opens Network connection enter the ID and password of the network you want to join and click Connect .

3. New network appeared in the list of our networks. It displays a computer that is also connected to this network. A green icon next to the computer name indicates that a connection with it has been established.

Additional settings LogMeIn Hamachi
Let's look at some of the settings of the LogMeIn Hamachi program.
1. Click menu System - Options .

2. On the tab Status you can see which email address the program is linked to, and also change Name. By default, the Name contains the name of your computer. You can install anything. You will be seen under this name on all Hamachi networks.

3. On the tab Safety can be checked Block new network members by default , if you don't want anyone else to join your network.

4. On the tab Options you can configure the screen saver to be displayed when the program starts, the chat to be displayed, automatic update, encryption and compression settings. And also go to additional settings.

5. Additional settings open quite wide program options. We will not describe all the parameters. The purpose of many of them is clear from the name. In most cases the program will work stably and without the need to deep settings. I will only note that if the connection between network participants is slow, you can try disabling the use of a proxy server, as shown in the figure.

6. After making all the changes, don’t forget to click OK at the bottom of the window.
Using Hamachi Network for Remote Desktop Access or Other Connection
Once your computer is networked with others through Hamachi, you can access those computers as if they were on the same local network as you.
If you have configured file and folder sharing settings, you will see shared folders other computers on the network in your network environment.
In other cases, you can access other computers using the IP addresses assigned by the Hamachi program.

Other computers can access yours using your IP address.

If you have connected computers into a network with the goal of connecting everyone to one of them via remote desktop, then you will not need a static IP address and . You can connect directly to the IP address of this computer in Hamachi.
Note. Hamachi has a limit on the maximum number of computers on a network (5 computers). However, you can create as many of these networks as you like.
If your goal was to connect computers together for a remote desktop connection, then main computer in this case, it must be on each network. For example, there is a server and 6 client machines. We create two networks, each of which includes a server and 3 client machines (or 4 and 2, or in any other ratio).
That's all. Thank you for your attention.
A local network makes it possible to move files between computers, launch and use games and programs together, and share the Internet. Connecting computers to shared network allows you to protect owners from the penetration of viruses into systems. There are several ways to connect PCs with different operating systems into a single local network.
Hardware interconnection of computers
Hardware aggregation uses technical devices with which several PCs gain access to a common network.
Via cable
The simplest connection option. To combine, you will need a special cable, a cross-over. Both ends of the cable are plugged into computers. One device transmits the Internet connection to another, which unites them into a network.
The main disadvantages of the method:
- Only 2 devices can be combined;
- There is a limitation on cable length;
- The additional cable gets in the way and can get tangled.
Via router
Using a router, you can connect any number of computers and laptops with a local network. A router is connected to one of the devices; it will distribute the network to the rest of the PCs. It is important that these devices support Wi-Fi connection mode. In this case, the IP address and access between PCs are set automatically.
The only thing that is required from the user is to enter the same names for the computers in the Connection Center.
If the device’s memory stores important files that should not be accessed by other network users, just click right click mouse over the folder and go to access settings.
Setting up a local network
Turning on devices and connecting a cable or router to them are not the only actions required to create a local network. When merging, it is important to configure the computers correctly.
When connected via cable
The following tuning algorithm must be carried out on both computers to which the cable is connected.
Setting up a workgroup and PC name
This action will allow you to set the same name for devices connected by cable. To do this you need:
- Press the key combination Win+R;
- 2. Enter the universal command in the input field sysdm.cpl (suitable for any versionWindows);
- Click the “Change” button;
- Enter a name for the workgroup computers (required in Latin);
- Save.
The same name is entered on the second device. 
Configuring IP, gateways and masks, DNS
In modern operating rooms Windows systems 8-10 this procedure consists of simply checking the boxes in the Network Control Center.

Owners of PCs with older system versions need to go through the following algorithm:

After this, the computers will be united into a single network.
Opening access to files, folders, printer
As mentioned above, on Windows 8-10, the procedure for sharing access and setting up a network comes down to selecting parameters in the Connection Center. Additionally, you can set general passwords for your PC.

On other versions of Windows:
- Start button;
- Control Panel;
- Folder Options;
- Click on the item to use the sharing wizard;
- Save and close;
- Go to the “My Computer” window;
- Find the PC name, right-click and click “Change”;
- In the settings, click the checkbox next to the relationship between the device and the workgroup;
- Go to the access tab, confirm permission for devices.
Internet access on a second PC
If the donor computer is connected to the Internet, the second device can also be connected to the network. To do this, you need to set the same connection settings as on the donor.
When connecting via a router
In this case, fewer steps are required from the user to configure connections on computers. Wi-Fi connection less demanding on settings, installed automatically.
Checking connections with computers
You need to reboot the router using the button on the back panel. This way, the configuration of the router itself will be correct, as it was set by the manufacturers. The router automatically assigns addresses to computers that are within its network area.
You can check whether all computers are connected to the router via Wi-Fi in the following way:
- Open a browser, enter 192.168.1.1 in the address bar;
- Enter the DHCP tab;
- Find the IP address of the PC that will be connected to the local network;
- Launch command line, enter “ping IP of another PC”;
- Wait until the check is completed.