Many have already appreciated the performance of SSDs - perhaps one of the most coveted and effective computer upgrades that can dramatically improve performance. In all respects related to speed, SSD outperforms conventional hard drives. However, in terms of reliability, not everything is so simple: on the one hand, they are not afraid of blows, on the other hand, they have a limited number of rewriting cycles and a different principle of operation. The latter must be taken into account when Windows setup to work with an SSD drive. Now let's get down to specifics.
Primarily, solid state SSD disks do not need to be defragmented, defragmentation is not useful, and harm is possible. I already wrote about this in.
All recent versions of Windows "know" about this and automatic defragmentation, which is enabled by default in the OS for hard drives, is usually not enabled for solid-state drives. However, it is better to check this point.

Press the Windows logo key and the R key on your keyboard, and then in the Run window, type dfrgui and click Ok.

A window with parameters for automatic disk optimization will open. Highlight your SSD ("Solid State Drive" will be indicated in the "Media Type" field) and pay attention to the "Optimize by Schedule" item. For SSDs, disable it.
Disable file indexing on SSD
The next point that can help SSD optimization- disabling the indexing of the contents of files on it (which is used to quickly find the necessary files). Indexing constantly performs write operations that could potentially shorten the lifespan of an SSD.
To disable, do the following settings:
- Go to "My Computer" or "Explorer"
- Right click on the SSD drive and select Properties.
- Uncheck "Allow indexing of the contents of files on this disk in addition to file properties".

Despite the disabled indexing, file searches on the SSD will be going on at almost the same speed as before. (It is also possible to continue indexing, but move the index itself to another disk, but I will write about this another time).
Enable write caching
Enabling disk write caching can improve the performance of both the HDD and SSD drives... At the same time, when this function is enabled, NCQ technology is used for writing and reading, which allows more "intelligent" processing of incoming calls from programs. ().

To enable caching, go to the manager Windows devices(Win + R and enter devmgmt.msc), open "Disk drives", right-click on the SSD - "Properties". You can enable caching on the Policy tab.
Swap and hibernate file
Swap file ( virtual memory) Windows is used when there is not enough random access memory... However, in fact, it is always used when it is turned on. Hibernation file - saves all data from main memory to disk for later quick return to working state.
For maximum duration SSD work it is recommended to minimize the number of writes to it and if you disable or reduce the paging file, as well as disable the hibernation file, this will also reduce them. However, I will not directly recommend doing this, I can advise you to read two articles about these files (it also indicates how to disable them) and make your own decision (disabling these files is not always good):
- (what is, how to reduce, increase, remove)
Perhaps you have something to add on tuning your SSD for optimal performance?
SSD - Writer digital information based on flash memory - microcircuits, which implies the absence of mechanical elements. High performance, a fairly high price and a limited number of rewriting cycles are the main differences between SSDs and drives on magnetic platters. The latter feature primarily excites the minds of owners of solid-state drives or those who are going to purchase such a device to install Windows 7 or 10 x64 on it in order to improve the performance of the computer. A similar procedure is practically the same in both systems. Therefore, it can equally be considered that the SSD setup in Windows 7 is absolutely identical to Windows 10.
In the proposed article, we will understand how the SSD is configured, the operating system is installed on it and some Windows settings 7 or 10, allowing to extend the operating time of such a drive. The fact is that the "seven" or "ten" in the process of work repeatedly refers to the system partition, not only to read any files, but also writes temporary files to the disk, the paging file and performs indexing. These and other similar actions will use up the working resource of the SSD at a significant rate and the disk will wear out faster than expected.
Transferring temporary files
The "Temp" directory is a directory for storing files with intermediate calculations during the operation of Windows 7 or 10. This service folder must be transferred to HDD after it ends installing Windows 7 or 10. This action will slightly slow down the computer, which will be virtually invisible to the user, but will increase the lifespan of the SSD.
This is done as follows:
- Go to the context menu "My Computer" and call it "Properties". Or right-click on the "Start" button and select "System" from the drop-down menu.
- In the left frame, click on the "Additional parameters" tab.
- Go to the "Advanced" tab and click on the "Environment Variables ..." button, as in the screenshot.
- Next, the new values of the environment variables are set.
- Select the "Temp" directory and click "Change".

- In the "By default" line, set the full path to the directory where temporary files will be stored. It is recommended to transfer them to the first disk in the list of HDD partitions.
- We do the same for the "Tmp" directory.
From now on, the magnetic disk will store service Windows files 7 or 10 x64, saving unnecessary wear and tear on the SSD.
Disable sleep mode
Sleep or hibernation - shutdown the computer and write the contents of the RAM to the system disk in the hiberfil.sys file. This mode gives you the ability to quickly turn on PCs with Windows 7 or 10. For computers with a large amount of memory (8 GB or more), this factor of SSD wear becomes even more relevant. In order to avoid unnecessary overwriting of unimportant information to the solid-state drive, you need correct setting operating system. For the sake of increasing the life of the drive, it is worth abandoning hibernation, especially since 7 or 10 starts instantly anyway.
- Hibernation is disabled by the "powercfg –H off" command entered into the command line launched with administrator privileges.

- It is launched by means of the "cmd" command in the Start search bar or through the context menu of the desktop.

Disable paging file
The paging file is used by Windows 7 or 10 to write under-used data in the event of a lack of RAM until they wait their turn. The speed of information exchange between HDD and RAM depends on many factors, but is significantly inferior to the operating time of RAM. The paging file not only slows down the work on a PC with a small amount of RAM, but also requires repeated operations of writing information to the solid-state disk .
If you want to extend the operating time of the SSD on Windows 7 or 10, turn off the paging file (it is better to buy a bar of RAM, it will never be superfluous). To squeeze the maximum speed out of your computer, you will have to sacrifice the working resource of the drive.
Disabling the paging file is as follows.
- We go to "Additional parameters", as in the previous method.

- In the "Performance" tab, click on the "Parameters" button.

- In the tab, as in the screenshot, click "Change".

- Uncheck the "Automatically select ..." option.

- Move the trigger switch to the "No paging file" position,
- If you want to use a paging file, select the HDD partition, preferably the first one, and set pagefile equal to the amount of installed RAM.
Disable drive optimization
Defragmentation is the process of collecting fragments of a file scattered over the surface of the media together. Fragmentation is carried out while writing information to disk due to imperfect file NTFS systems... A high degree of fragmentation negatively affects the performance of the drive due to the fact that the reading magnetic head has to make much more movements than if the file fragments were in neighboring clusters. But on SSD, document fragmentation practically does not affect performance, therefore it is not recommended to defragment it and you must turn off scheduled defragmentation (configuring and disabling SDD defragmentation in Windows 10 occurs automatically).
- We go into the properties of the SSD-disk and go to the "Service" tab.
- Click "Defragment".

- Click on "Configure Schedule" and uncheck the box next to "Run as scheduled."

Indexing
Indexing is the procedure for adding data about files stored on disk to a special list called an index. This data is needed to search for information on a PC with Windows 7 or 10. If your SSD does not store hundreds or thousands of personal files and you rarely need to search for something on the disk (for this you can use the functionality of Total Commander or other applications), it is reasonable to deactivate indexing. This will slightly reduce the number of requests to the drive in write mode. The setting is done as follows.
- Select the disk and select "Properties" from the context menu.
- Uncheck the box next to the "Allow indexing ..." item, as in the screenshot.

Program cache
Many applications, such as Internet browsers, use data caching to get quick access to it next time. The situation here is the same as with the swap file and temporary directories: if you want maximum speed - sacrifice the SSD resource, expensive storage - transfer the cache or install the browser itself on the hard drive .
Alternatively, the use of free RAM to create a RAM disk in it, which will store the cache of the browser and other programs. Setting up and creating such a disk is a simple process, but it looks different for each application, which is beyond the scope of this article.
Recovery points
Disable the creation of points Windows rollback 7 or 10, which will also have a positive effect on the service time of the SSD.
- To do this, go to the "Properties" directory "My Computer".
- In the "System Protection" tab, select the system disk and click configure.

- Move the switch to the position "Disable system protection", click "Delete" and save the changes.
Simplifying the setup process
When using SSD Mini Tweaker, setting up Windows 7 or 10 to use a solid state drive is carried out in a few steps.
- Download, install and run the application.
- Checking the boxes next to unnecessary options is carried out using the knowledge gained above.

- Click "Apply Changes".
- Setting new parameters will take effect after restarting the PC, so we restart the system.
Setting most of the parameters in the SSD Mini Tweaker is also done manually, but through the program, the settings windows open with one click.
(Visited 11,681 times, 1 visits today)
Solid state drives, as many know, are significantly faster than mechanical hard drives. However, they are much more expensive. Every gigabyte of storage space on a solid-state drive costs a pretty penny. Although SSDs are very fast, many users claim that SSDs can be further accelerated by making simple optimizations. In this article, we'll take a look at nine popular Windows SSD optimizations and assess their impact on performance.
Introduction
Solid state drives, as many know, are significantly faster than mechanical hard drives. However, they are much more expensive. Every gigabyte of storage space on a solid-state drive costs a pretty penny. Although SSDs are very fast, many users claim that SSDs can be further accelerated by making simple optimizations.
This article was born out of our own efforts to maximize the available space that you can squeeze out of your precious SSD. We also wanted to test the validity of user claims for performance improvements by testing several models. We were wondering if the optimizations will lead to an increase in performance, are they related to the models of a certain manufacturer, or they can be called universal. Or perhaps all of these optimizations are completely pointless and do not increase the performance of the SSD.
We'll start by looking at nine of the most recommended SSD optimizations that many users advise after installing an operating system on an SSD. Microsoft Windows 7.
* Disable system protection (System Restore)
* Disable Drive Indexing
* Disable paging file (PageFile)
* Disable Hibernation
* Disable Prefetch and Superfetch
* Disable cache Windows entries
* Disable Superfetch and Windows Search
* Disable ClearPageFileAtShutdown and LargeSystemCache
* Adjust power settings
Before we move on to considering the optimizations, it does not hurt to check that your SATA controller is operating in AHCI mode, and the TRIM function under Microsoft Windows 7 is active.
Enabling AHCI and TRIM
Check that the SATA controller is in AHCI mode.
During the installation process, make sure that the BIOS is set to AHCI mode for the SATA controller. AHCI mode is required for native TRIM support on SSDs.
Check that the SATA controller is set to AHCI mode.
* From the Start menu, select "Control Panel".
* Select "System" in "Classic View" (or in small or large icons mode under Microsoft Windows 7).
* In the Device Manager find the item "IDE ATA / ATAPI controllers / IDE ATA / ATAPI controllers".
If the item is present, then open it and find the controllers with the name AHCI in the list. If there are controllers named AHCI, then the system operates in AHCI mode. If no such controllers are displayed, then your system is not in AHCI mode.
If you installed the operating system in IDE mode, then we recommend switching to AHCI mode after following the steps in http://support.microsoft.com/kb/922976. Of course, if your BIOS supports AHCI.
It is best to enable AHCI support because only then can TRIM and the native command queue (NCQ) be enabled. Solid-state drives are very fast, but they only unleash their performance potential when processing multiple commands at the same time (this is why SSDs perform better when using queue depths up to 32 compared to QD = 1).
Check that TRIM support is activated
Check TRIM to ensure that TRIM commands are sent to the SSD by the Windows operating system. You can check if TRIM support is active as follows.
* IN command line type "fsutil behavior query DisableDeleteNotify"
If DisableDeleteNotify = 0, then the TRIM function is active. If DisableDeleteNotify = 1, then the TRIM function is disabled.

Do not include quotation marks when typing a command.
TRIM is a SATA protocol command that tells the operating system which blocks of data previously written to the SSD are no longer needed due to file deletions or formatting. This allows the SSD to perform garbage collection, otherwise writes to the SSD would slow down significantly.
Well, let's see how justified the optimizations recommended by many users are!
Optimization 1. Disable system protection
Disconnection process:
* Right click on “My Computer” and select “Properties”.
* Select the item on the left “System Protection”.
* Click the "Configure" button
* Select “Turn Off System Restore”.

The System Restore function should be disabled to limit the number of unnecessary writes to the SSD, as well as to reclaim the available space back to the SSD (we'll talk about how much space you get a little later). In addition, there is a very popular view today that "System Restore" will degrade SSD performance over time due to its write-to-SSD nature and the impact on TRIM. We can recommend the following article for more information (in English): System Restore and Your SSD.
Optimization 2. Disable disk indexing
Disconnection process:
* Open "My Computer / My computer";
* Right click on the SSD and select "Properties";
* Uncheck "Allow files to have contents indexed in addition to file properties".
* A pop-up menu may appear informing about an error applying attributes. This is fine, select the “Ignore All” option and continue.

The idea behind disabling disk indexing is as follows. 1) Indexing was designed for mechanical hard drives to provide faster access to files. Since the response time of the SSD is about 0.1ms, there is no need to enable this technology. 2) Eliminate unnecessary write operations on the SSD. The effect is minimal, but all actions that allow you to limit write cycles to an SSD help in the long run.
Optimization 3. Disable paging file
* Right-click on the "My Computer" icon.
* Select "Properties".
* Select the "Advanced" tab.
* Under Performance, click the Settings button.
* Select the "Advanced" tab and click the "Change" button for the virtual memory.
* Uncheck "Automatically Manage Page File Size For All Drives"
* Specify "Yes" and confirm to restart the system. Then disable the paging file for the SSD drive.

The paging file (PageFile) is a function of the operating system that is designed to help the physical memory of your computer in case of its lack. It allows you to move some of the information from memory to the hard disk in order to free up the available amount of RAM. Turning off PageFile frees up the space reserved for the paging file on your hard drive, but you may run into resource problems if the system needs more memory than the physical one.
Optimization 4. Disable hibernation
Disabling hibernation will reclaim 2 GB (or more, depending on the amount of RAM) of precious space on your SSD. And the hibernation function does not provide much benefit in the case of SSDs due to the fast boot times.
Disconnection process:
* In the search menu "Start / Start" type "cmd" to find the Windows command line utility;
* Click on the cmd program with the right mouse button and select "Run as Administrator"
* At the command prompt, type "powercfg -h off". Do not include quotation marks when typing a command.

The hibernation function was designed for hard disks so that the system can restore its work as soon as possible after inactivity (the contents of the RAM when hibernation is activated is flushed to the hard disk, and then read on waking up). In the case of low SSD access times, there is no point in using hibernation. If you disable hibernation, you can free up precious SSD space.
Optimization 5. Disable Prefetch and Superfetch
Disconnection process:
* Type Regedit in the Run menu.

* Select an item; "HKEY_LOCAL_MACHINE \ SYSTEM \ CurrentControlSet \ Control \ SessionManager \ Memory Management \ PrefetchParameters"
* Right-click on the items EnablePrefetcher and EnableSuperfetch;
* Select "Change" and set the value from 1 (or 3) to 0, then reboot.

SuperFetch technology is designed to cache the most frequently used data, but given the low access time of the SSD, this function can be disabled.
Prefetch technology preloads frequently launched programs into memory. By disabling this feature, you can free up memory, and the SSD will only work when you need it.
Optimization 6. Disable Windows Write Cache
This step is not recommended for Intel SSDs as it will negatively impact their performance. We recommend running performance tests before and after disabling the cache to determine if the effect is positive or negative.
Disconnection process:
* Right click on “My Computer” and select “Properties”.
* Select "Device Manager".
* Select "Disk Drives".
* Right click on the SSD and select Properties.
* On the "Polices" tab, uncheck "Enable write caching on the device".

Windows Write Caching uses high-speed RAM to accumulate write commands that need to be executed on the drive until the drive can write. SSDs are much faster than traditional mechanical hard drives, so the speed advantage of using caching is much smaller.
Optimization 7. Disable Superfetch and Windows Search
Disconnection process:
* Press Winkey + ‘R’ to bring up the startup dialog.
* Type "services.msc" (without quotes) and press Enter.
* Scroll down to Superfetch, then right-click on it and select Properties.
* In the drop-down menu "Startup type" select "Disabled / Disabled" and click Ok.
* Scroll down to Windows Search, then right-click on it and select Properties.
* Click on the "Stop / Stop" button, then in the "Startup type" menu select "Disabled / Disabled" and click Ok.

Windows Search function / Windows Search creates an index individual files, folders and other objects on your hard drive. The index is located in the "C: \ ProgramData \ Microsoft \ Search" folder and occupies about 10% of the contents of the indexed files. When searching for a file with using Windows Search part of the index is loaded into memory, which provides a very quick search... In the case of a short SSD access time, this feature no longer really matters, and it can actually negatively affect the performance of the SSD.
Optimization 8. Disable ClearPageFileAtShutdown and LargeSystemCache
Disconnection process:
* Type Regedit in the Start menu.
* Select the path "HKEY_LOCAL_MACHINE \ SYSTEM \ CurrentControlSet \ Control \ SessionManager \ Memory Management"
* Right-click on ClearPageFileAtShutdown and LargeSystemCache.
* Select "Change" in each item, then change the value from 1 to 0, then restart the system.

ClearPageFileAtShutdown does what the name suggests, which is to clear the PageFile when you shut down your computer. This leads to additional write operations. Since we have disabled the PageFile, as mentioned above, there is no reason for us to clear it when we turn off the PC.
The LargeSystemCache parameter specifies whether the system supports a standard size cache or an expanded cache, and also affects how often the system flushes cached pages to the hard disk. Enabling LargeSystemCache mode reduces the amount of physical memory available for applications and services.
Optimization 9. Setting power options
Go to "Control Panel / Control Panel"
* Select "System and Security / System and Security"
* Select "Power Options"
* Select "High Performance" and apply it
* Select "Change Plan Settings" for the "High Performance" plan
* Click on "Change Advanced Power Settings"
* In the item "Hard disk" set the value "Turn off hard disk / Turn off hard" in "Never / Never", that is, 0 minutes.
* Select OK and save the settings.


This setting will allow garbage collection to continue working even when you are not interacting with your computer.
Recently, solid state drives are gaining considerable popularity and becoming more affordable in price. Considering that the speed of SSD drives is much higher than the speed of conventional HDD drives, it is quite logical that many people decided to increase the performance of their computer by purchasing this miracle of modern technology. A solid-state drive can really help your computer "think" faster, but for this you should take into account a few points, which we will now talk about.
Make an SSD a system drive
Performance gains can only be achieved by installing a solid state drive as the system drive. Otherwise, the speed of work will increase only in those applications that are installed directly on the SSD, and even then not by much.
Update disk firmware
The newer the firmware version, the faster your SSD will work. Latest version firmware can always be found on the manufacturer's official website. Download the driver and install it in accordance with the instructions (must come with the driver).
Build the system from scratch
It is best to install the operating system on a new SSD drive from scratch, rather than restore from an image. This will help to avoid compatibility conflicts in future operation.
Disconnect other drives
Before installing the operating system on the SSD, it is recommended that you turn off the power or unplug the SATA cables from all other drives. This is necessary for Windows 7 to accurately determine the type of drive and reconfigure services to work with an SSD drive.
Put on a clean image
Only original and full should be installed on the SSD. windows image 7. "Optimized" Windows assemblies, of course, take up less disk space, but they can disable or even remove services and functions that are vital for the stable operation of the operating system on an SSD.
Activate AHCI mode
Before installing Windows 7 on your SSD, turn on the BIOS settings recognition of SATA devices in AHCI mode. This option allows you to activate some of the new Windows functions aimed at speeding up the disk subsystem.
Format the disk
If your SSD has already been used before, you must completely format it before installing the operating system. Since the principle of writing data to HDD and SSD is significantly different, then quick formatting for an SSD disk will not be enough.
Mark correctly
Partitioning an SSD is more convenient and reliable using third-party utilities such as Acronis Disk Director.
Check it out
Having installed Windows 7 on your SSD, it does not hurt to check how correctly it is recognized by the system. For this, it is best to use free program CrystalDiskInfo. We launch the program and look at information about our disks. In line Rotational speed the disk type must be specified - SSD. Also in the line Capabilities the TRIM function must be specified.
Now let's check if the AHCI mode is active. We go to the Task Manager and in the item IDE ATA / ATAPI controllers looking for a controller named AHCI. If there is none, then we restart the computer, go to the BIOS settings and try to activate the AHCI mode again.
Disable indexing
The indexing feature helps speed up searches in the operating room environment. Windows systems... However, this option increases the load on the disk, thereby accelerating wear and tear and slowing down (a little, but still). In addition, the solid state drive due to its high speed and without indexing quickly finds required files... Therefore, you can safely turn off indexing. To do this, go to Explorer, right-click on the icon of our SSD drive and select in context menu paragraph Properties... Then uncheck the parameter Allow indexing of the contents of files on this drive in addition to the file properties.
Disable the defragmentation service
Due to a different operating mechanism than HDD, the defragmentation service for solid-state drives is not needed and even contraindicated (NAND memory used in SSD drives has a limited number of rewriting cycles). As a rule, Windows 7 automatically disables the defragmentation service during installation on an SSD, but if this does not happen, then we can disable it manually. Open the menu Start, press Execute and write in the line: services.msc... Now we find the service in the list Disk Defragmenter, double-click on it with the mouse and in the field Launch type select the parameter Disabled.
Disable creation of restore points
When the Windows restore point creation function is active, the TRIM function, which is very important for SSDs, is blocked, which ultimately leads to a gradual decrease in the speed of the SSD drive. To disable the function of creating restore points by the operating system, right-click on the icon My computer, go to Properties and go to the tab System protection... Here we click on the button Tune and select the item disable system protection.

Still have questions? - We will answer them for FREE in
Windows 7 was not originally designed to run on an SSD. Since their introduction, Microsoft has released numerous updates to improve the OS on solid state drives. However, it is necessary to carry out additional manual optimization, which gives much more effect.
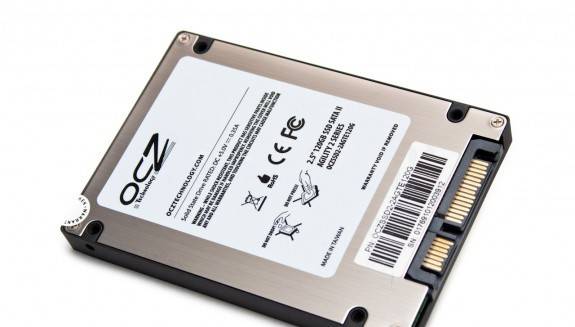
SSD drive
Solid State Drive is a storage device based on flash memory and a host controller.
They are widely used in computing and have some advantages over HDDs:
- high speed;
- impact resistance;
- heat resistance;
- small size and weight;
- noiselessness.
- the solid state disk controller supports this command;
- SATA mode enabled: AHCI.
In Windows 8 and above, they work stably and quickly, but under older operating systems, wear and performance problems are inevitable. To avoid this, you need to optimize the parameters, which is what this article is about.
What optimization gives
Windows 7 has several services that increase the performance of conventional hard drives. But with SSDs, they are not only not useful, but interfere with the work and significantly reduce the life of the device. Setting up Windows 7 on the SSD nullifies all attempts by the OS to destroy it, and allows you to achieve better performance.
Are solid state drives faster?
Even if we compare the maximum read / write speed declared by the manufacturer, the difference will be huge.
The linear speed of solid state drives is 3-4 times faster.
A typical hard drive rarely achieves 180 MB / s read speed. At the same time, he does not waste time moving the head, but concentrates on reading the data.
For a regular storage system, such as the Kingston SKC380S3, the limit is 550 MB / s. for reading and 520 for writing. In linear read mode, it uses all channels and reads data in large blocks. However, if you do a deeper analysis of performance, the superiority of SSDs will be even more impressive.
When we test the speed of reading 512 KB blocks (small files), the gap becomes even wider. The SSD does not spend a lot of time looking for a block, as a result of which its speed still remains within 500 MB / s. The hard drive spends more time moving the head than reading files. Its speed is reduced by three times and averages 60 MB / s, which is 8 times slower than the SSD.

If you go deeper into the tests and check the speed on 4 KB blocks, then the SSD will bypass the hard drive 50 times. Loading the OS, copying documents, small images and launching programs - all this corresponds to this mode of operation. In addition, SSDs can handle multiple requests at the same time, while HDDs are single-threaded.
Video: how to properly configure the system to work
Setting up an SSD in Windows 7
This process requires patience and includes the following procedures:

Setting up Windows 7 for an SSD starts with flashing the drive. All manufacturing firms regularly release new versions of software for their devices, in which errors are eliminated and weak spots previous versions... You can download it from the official websites of the brand. The software bundle also usually includes instructions for installing it and updating the firmware.
AHCI and TRIM
The SATA interface has many features that speed up data exchange. In order for them to become available, you need to enable the AHCI controller, since most PCs are still configured by default to work with the legacy ATA controller. You can switch to AHCI both automatically and manually.
Automatic switching:

During the next Windows startup 7 will do the rest of the work itself. If for some reason the utility does not work, then you can do everything manually.
Manual switching:

As a result, after a reboot, the AHCI controller will be visible in the device manager.

With AHCI done, the next in line is the TRIM command. It helps the OS to notify the SSD about which data the file system no longer contains, and which drive it can delete. That is, this command cleans up the garbage and does not allow it to degrade the performance level.
You can enable TRIM if the following conditions are met:
If the conditions are met, you can proceed to enable TRIM:

Disabling system protection
The instruction is pretty simple:

It is important to understand that by disabling protection, the OS will not make recovery checkpoints, and in the event of a failure, it will be impossible to resort to Windows recovery. Therefore, it is worth using software other developers to provide recovery functionality, such as Acronis True Image.
Disable disk indexing
Indexing is carried out only in order to speed up the process of searching the hard disk. Considering the SSD's multithreading and performance, the indexing and search service is unnecessary.
Disable search like this:

Disable indexing like this:
- open "Computer";
- right-click on the section -> Properties;
- at the very bottom of the window that opens, uncheck the "allow indexing ..." checkbox;
- apply and close the window.
- by going to the Service tab -> Optimize;
- by selecting a section and clicking to change the parameters;
- unchecking the box next to "run on schedule".

Along the way, you can also disable defragmentation there, which is useless on SSDs due to quick access to cells.
This can be done:
Disable paging
The paging file is required for programs that require a large amount of memory. If there is not enough RAM, then temporary data is loaded into this file. You can disable it only if your computer has enough RAM (at least 8 GB). Otherwise, it is better to move the swap to another partition, that is, to the hard drive.
Disconnection:

Disable hibernation
Computer hibernation or deep sleep was invented by Microsoft so that the computer does not spend a lot of time starting up. This feature allows you to power off your computer without closing any applications. Upon subsequent awakening, the work of all programs continues.
At the same time, when the PC falls asleep, a large amount of data is written to the drive and the SSD wears out faster. Also, for many, hibernation is not necessary, as a PC with a solid state drive boots up very quickly.
If you decide to disable hibernation, then you can do it like this:

SSD Tweak Utility
You can use the SSD Tweak Utility to optimize your system to use your SSD automatically. The program allows you to quickly and easily do everything that was stated above, except for turning on the AHCI mode. The program is published with a different set of instruments.

There is a free version with a basic set of functions:
- disabling defragmentation;
- disable recovery;
- stop indexing.
The paid version of Tweaker Pro also has other features:
- enabling and disabling services;
- setting hibernation parameters;
- validation and experimental optimization of the TRIM team.
A deeper setting is possible in the program, which includes many more parameters. After starting the program, on the right side of the window, you can see detailed description and advice on setting up the system.

To start optimization, just press the big button in the middle of the program window - autotuning configuration. The utility will automatically configure the basic parameters and provide a report.
Customization and Windows optimization 7 under SSD - the process is not fast, accompanied by several system reboots and BIOS visits. However, if you do not configure, do not disable unnecessary services, then after a few months the once-fast SSD may exhaust its supply of write cycles and stop working.
To prevent this from happening, after each reinstallation of the system, it is imperative to optimize it. This can be done either manually or automatically using the SSD Tweaker utility.