Control your smartphone from your computer. In practice, there are often situations when an Android device needs to be connected to a Windows local network, for example, this desire often arises among owners of SmartTV boxes when playing media content from a home computer. Let's take a closer look at this.
Windows settings
Launch the classic "Control Panel" where we go to the "Network Control Center ...".
Click "Change additional parameters ...".

The "Additional parameters" window appears, we set the settings for three subsections:
"Private (current profile)" ... We include

"Guest or public" ... Turn on network discovery and sharing.
"All networks" .

After finishing editing, save, close the window. However, this is not all, you will need to "share" the folder (set up sharing over the network) - it will be available from the Android device. Right-click on it, in the drop-down menu, click the "Properties" item, and go to the "Access" tab. Here we will need to click the "Share" button. 

Now in the properties window, switch to the "Security" tab and click "Change". Another window opens, where we press "Change".

Then we click "Advanced", then "Search".

From the list of "Search results" select "All" and save the changes.

Android settings
You cannot set up a local area connection using the Android system tools. To complete the necessary task, we need the file manager ES Explorer. We load and run it, in the left side menu we tap "Network" - "LAN".

We press "Scan", we are waiting for the end of the results.
We expand the possibilities of data exchange between a home computer and a device on the Android platform using a file manager. While preparing the material "File Manager for Android" I came across a cool function for connecting Android to the local Windows network. So, let's take an example how to do this.
Given: Wi-Fi hotspot access, operating room computer Windows system(in my case it's Windows 7), Android gadget with installed file manager, which has a SAMBA server function (I have ES File Explorer).
Step one: create a new user on the computer
This is not a mandatory step, you can use the data of already created users, but I decided to make a new one, especially for authorization through my Android phone.
To create a new user, go to: Start - Control Panel - Add and Remove Accounts.
Everything is simple here, the only thing is to do the accounting with normal access. After that, be sure to create a password in your account settings.

Step two: create a shared folder on your computer
Not necessarily a folder, you can connect a whole section, for example, drive C. Right-click on the document or folder to which we want to open access, go to the "Access" tab and click "Shared". In the drop-down menu, select the username that you created in the previous step, and do not forget to set the permission level for read and write.

The general section to which we will connect from the Android system has been created.
Step three: create a server in the file manager
Launch ES File Explorer, go to the LAN tab. Press the hardware key "Menu", then "Create" in the dialog box, press "Server".

There are a lot of all sorts of incomprehensible settings, but if you figure it out, there is nothing wrong with them.

Now let's talk about everything in order:
Domain: leave blank
Address: here we drive in the IP of our computer (this parameter can be found by writing the ipconfig command to the Windows console, how to get into the console can be seen in the screenshots below)

 Login: account name from the first step
Password: account password from the first step
Name: leave blank, or come up with any name for our server
After you have entered all the data, click "OK". Congratulations! The server has been created, now we can log into the computer directly from our phone (or tablet).

It's so easy to set up a network between Windows and Android 🙂 If you have any questions, ask in the comments, I will definitely answer.
UPD: it is not always necessary to use the network for data exchange, it is often necessary to play some kind of copper files from a computer, for this purpose it is perfect.
Articles and Life Hacks
Users who have at their disposal modern gadgets - smartphones or tablets, sooner or later the question arises, how to connect Android to the home network?
After all, sooner or later, everyone will want to get access from a mobile to the contents of a local computer. At the same time, it is important not only to familiarize yourself with files, watching videos, photos and listening to music, but also two-way copying of files.
What is required to connect
To connect Android to a local network, it is required to have:- Wi-Fi router to which the device should be connected;
- Windows computer;
- configured Internet access from the very mobile phone where the file manager (ES explorer) should be installed.
Connection instructions

First, you need to provide access via the network to the necessary files and folders on the computer (or to the whole disk). For this you need:
- by entering an account, create a new username for the mobile: go to the "Start" menu, select the "Settings" item, and then - "Control Panel" and click on the item " Accounts users ", add a new record, specifying the boundaries of the rights of the created user;
- go to the "Access" tab;
- select the item "Sharing";
- in context menu select a pre-created mobile username, while you can also set the permission level when reading files;
- then you should open the settings menu on the mobile and activate Wi-Fi: this option will become available if you go to the "Wireless networks" section;
- connect to the network by correctly choosing its name, and carefully enter the password; in this case, you can select the option "show password characters", in order to avoid mistakes when entering it.
After Android is connected to the network, the user will immediately have access to all folders and files to which access is allowed, and will be able to perform the necessary actions with them.
Today smartphones and tablets have become closely integrated into our daily life. It's hard to imagine that a few years ago no one knew what Android was and that devices running this operating system may not be in every apartment. But besides surfing the Internet, playing games and chatting in social networks advanced users use tablets and smartphones to view photos and watch videos. Therefore, we are often asked questions like:
- How to watch a movie on a tablet from a computer over the network;
- How to log in from a smartphone to a computer;
- How to access a network folder from a smartphone.
Today we decided to answer these questions. Because thanks to the abundance of applications on Google Play, this task can be easily solved. Below we will tell you how to access a computer's network folder from an android device.
Access from Android to Windows. Computer side settings
2 We open access to the desired folder. For example, we took a typical and simple situation: we place media content on separate disk and open access from the local network to the whole disk:
Right click on the desired folder / drive and select Properties:

Go to the tab Access and press the button Advanced customization:

Check the box Share this folder, specify a name for the network folder, and click OK:

Access is open. Now press Close to close the folder properties window:

Access from Android to Windows. Settings on the smartphone / tablet side
Installing the application.
Run Play Market:
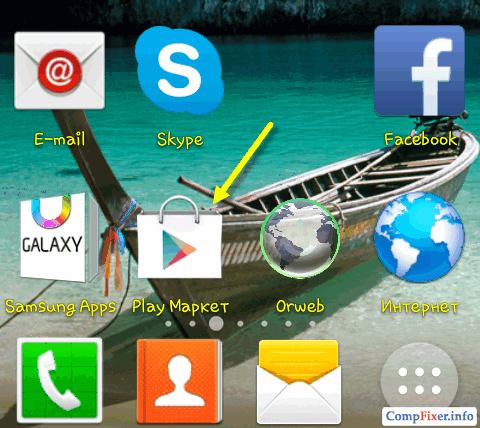
In the search bar, enter es file explorer and press Search:

Select an app in the search results ES Explorer from the developer ES APP Group:

Click on Install:

Click on To accept:

After the download and installation of the application is complete ES Explorer(or ES File Explorer) press Open:

Customization ES File Explorer
The app has three screens:
- Home page (HomePage);
- Device;
- Net.
Go to the screen Net by swiping to the side and press the button in the lower left corner Create a:

Select the connection type from the list: LAN:

In the settings window Server specify:
- Server IP address;
- Username;
- Password;
- Display name (optional)
and press OK:

To the list titled LAN your computer will be added (it can be a laptop, server, network storage, in general, any network device with a drive).

Using ES Explorer to access a computer over a network from an Android device
Click on the icon of the newly added network device (see the figure above).
If the username and password were specified correctly, you will see a list of network folders.
In our example, we opened the necessary network folder with media content under the name Media... Therefore, we go to the network folder Media:

In it we see videos:

And audio recordings in the folder Music:

We check the music playback - click directly on the file in the network folder. A window appears with the choice of the player. Check the box Set as default and choose your favorite player:

The recording will be played:

You can switch the folder display to a list or a table using the button View:

How to copy a file from computer to Android device
With a long press on the file, turn on the selection mode.
Check the files you want to copy from the network drive to your Android device.

Click the button Yet and select Copy to:

Select the folder on your Android device where you want to copy files from the network folder and click OK:
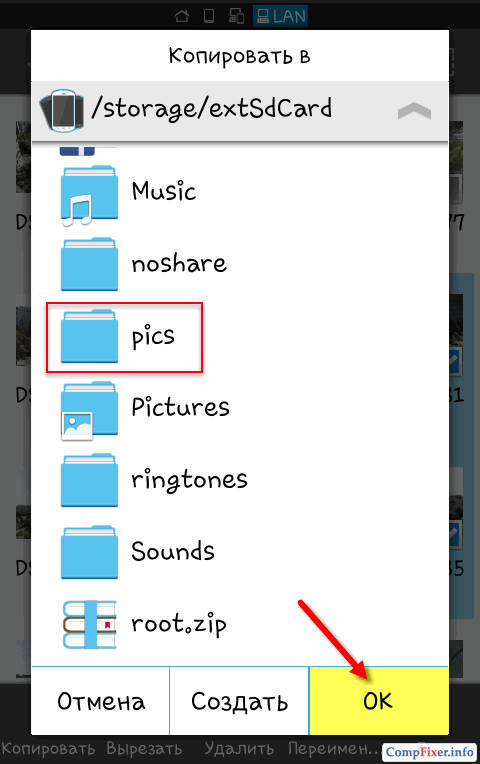
Create another folder in the folder or just click OK to copy files directly to the current folder:

Files are being copied:

A local network (in our context, a home network) is a group of interconnected computers, laptops, printers, televisions located within a house or room.
Benefits of using a local network:
- Access to general network services.
A) free exchange of file resources over the network (you do not need to transfer a file (photo, music, film) from one computer to another, using a USB drive, you can transfer it by means of a local home network).
B) Using a network printer. If you have a printer installed at home, using your home local network, you can print from any computer / laptop to this printer.
C) Using a home network to build a play area. Many games support LAN play, and if you have one, you can play games with computers on your LAN.
- All members of the local network can access the Internet (if configured). If you use Wi-Fi in building a home local network, then tablets and phones can also be connected to a local network and go online from them.
Local home network can be created different ways, I will give diagrams of the most popular of them, starting with the most primitive and ending with more complicated methods, with setting up the Internet in a local network.
Connecting two computers / laptops to a home LAN using a network cable.
Let's analyze the easiest way to combine two computers into a home network (computer - computer or computer-laptop). For this we need two computers / laptops and one network cable. Modern network cards are able to recognize what crimp your network cable has, so you can crimp or buy a crimped cable Computer-Hub / Switch (direct crimp).
A schematic of a computer-to-computer connection looks like this:
Pros of this way of creating a home network:
To create a network, you only need a cable and a clear head.
In this way, in most cases, only two computers / laptops can be connected, since most computers / laptops have one network card.
It is necessary to manually register the IP address and mask on all computers / laptops in the home network.
Combining multiple computers / laptops into a home local network using Wi-Fi.
This method requires Wi-Fi on computers / laptops.
Connection diagram:

Advantages of this method:
Lack of wires
High mobility of the workplace
Combining network devices into a home local network using a switch (switch).
For this method, we need several computers / laptops, the same number of network cables and a switch (hub). General scheme connection using a network switch looks like this: 
Those. we connect one of the devices to each port of the switch (laptop, computer, printer or TV).
Advantages of this method:
- Ability to connect more than two computers / laptops to a local network (depends on the number of ports in the switch (switch))
Minuses:
- It is necessary to additionally buy a switch (switch), it costs about 500 rubles.
- It is necessary to manually register the IP address and mask on all computers / laptops of the local network.
Connecting computers to a home local network using a router.
Using a router, you can set up a home local network with the Internet, if your router supports wireless Wi-Fi data transmission, then in addition to computers, laptops, printers, TVs, tablets and phones can be added to the local network.
Home local network diagram using Wi-Fi router/ router: 
With this method of creating a local home network, it is necessary to enable DHCP on the router - a service responsible for the automatic distribution of network settings (by default, this function is enabled).
Pros of creating a home network using a router:
Helps to unite various devices(computer, laptop, printer, tablet, smartphone) into one local network.
The ability to set up the Internet on your home network.
There is no need to manually write network settings on each device.
The need to purchase a router (from 1000 rubles) and its configuration.