There are several ways to recover lost information from your phone. Such as the:
- backup copy;
- help from google service;
- resuscitation programs.
In this article, we will take a closer look at each of them and help users in a seemingly hopeless situation.

By creating backup you can protect yourself from loss important information... This can be done with some utilities;
- 7-Data Android Recovery
- Titanium Backup
- Super Backup SMS & Contacts
- Helium
- Backup your mobile
- Organizer Mobile
- Suncit
Recovery mode
Standard environment for resuscitation of any lost data, the simplest way to create a copy of the system. Recovery mode manual.
- Disconnect your smartphone
- Press the power and volume buttons at the same time, hold them until the recovery starts.
- Once in Recovery mode, open the backup and restore tab.
- In the list that appears, click Reserver copy

Root rights and how to get them
Most applications require root (root) access to the system (super user). This is because when performing an operation Reserve copy the software must perform low-level interaction with the device. It can also involve interacting with the smartphone hardware (storage unit).
To protect the device from receiving any malicious attacks, the developers have established some rules. For example, most smartphones follow the MTP protocol. According to him, users cannot interact with the device at an advanced level. Super user rights, give full access to the system. You can get them using the utilities:
- Framaroot
- VROOT
- Root master
- DingDoon
Fortunately, there are many utilities that can retrieve deleted documents without gaining root access. The best are:
- Dumpster
- DoctorFone
Doctor Background

This utility will return any information missing from your personal device.
Instructions for using the program Doctor Fon.
- After launching the application, connect your phone to your PC.
Enable USB debugging (optional)
1) for version 2.3: enter "settings"< «приложения» < далее «Разработка» < проверьте « отладка USB»
2) for version 3.0 to 4.1: enter "settings"< «параметры разработчика» < проверить « отладка USB»
3) for version 4.2 e: enter "settings"< «номер сборки» два раза, пока не получите заметку «вы находитесь в режиме разработчика» < обратно в «Настройки» < «параметры разработчика» < « отладка USB
Note: if the program does not scan anything for a long time after clicking "allow", check your device again. Sometimes you need to click "allow" several times until it appears again, then the program will start scanning on its own. - Select files. To save time, after clicking "next", select the desired photos, videos, messages, contacts. Select standard mode or advanced. The process will take a few minutes. Once the scan is complete, you can preview the files you can return. After previewing, check the ones you want to keep and click “save”.
Resuscitation in case of damage to the phone

If you have important documents on your smartphone, which you want to access urgently, and cannot do it, due to the fact that the screen is broken and the smartphone does not turn on ADB DATA Recovery tool successfully copes with this task. This requires:
- ADB and Fastboot must be installed on PC
- USB debugging and developer options.
In addition, you must have at least 50% or more of the battery on your device.
Instructions for ADB Data Recovery Tool
- Power off the damaged device completely and restart it in fastboot mode by pressing the Power + Volume Down button for 4-5 seconds.
- After that, you will need to open the folder where you installed ADB and Fastboot, as indicated in the prerequisites section, and open the window command line inside it.
- Now make sure the machine is connected to the PC correctly. In order to check this, you must enter the following command: fastboot devises fastboot devices [If you see an alphanumeric code on the next line after this command, you can be sure that your phone is connected to the PC]
- Now enter recovery mode by turning off the device again and pressing the Power + Volume Up button for 4-5 seconds and you will see the recovery screen on the device.
- After that, you will need to go to the ADB tool that you downloaded to your PC and open the application.
You will see the four system recovery options that we have listed.
- (OUT) ... .. OUTPUT LOCATION (default = C: \\ RecoveredData)
- (ADB) ... .. SET LOCATION (def = C: \\ platform-tools)
- (DEV)… .. SET DEVICE TO USE (USB devise or Emulator)
- (RUN)… ..RUN
Now, if you need to change the default output location, you need to enter 1 and continue. You also need to set the location by copying the path to the installation folder on your device and pasting it into the app. To do this, you need to enter 2, click enter and paste the link to the folder.
You will be able to retrieve data from the SD card through input 1. In addition, you can also choose between other options such as retrieving data from DCIM, Media, Music, and other folders. Save all data that is available on the SD card. After this step, all information will be pulled through ADB and will be available on the PC for further use.
Use of Google
Google Drive is one of better solutions for cloud storage, available on most platforms. You can use it to synchronize between Google drive and your device, and any changes made on the server linked to the local folder are reflected in real time.
After google install Drive utility will automatically use its account... It will then ask you to grant special permissions to access the data on the disk and perform preconfiguration.
Select one of the folders in the phone memory that you want to link with Google cloud storage for synchronization. Create a new one, if you don't already have a dedicated one, link it to the Google Drive storage in the next step.
Resuscitation programs
Returning data via iReparo
iReparo - software for recovering deleted information, successfully reanimates data from any gadget. The user only needs to connect his device to the computer using a cable, then you need to run the utility. iReparo will scan data for internal memory and an external SD card of the connected unit. Once the scan is complete, users can view the lost files and selectively reanimate them.

Instructions for using iReparo
- Install iReparo on your PC
- Run the program.
- Select the files you want to check back.
- Connect android to PC
- Follow the instructions on the screen to program and enable debugging.
- When the phone is recognized, press the "Start" button to scan
- Move the mouse and click each category to view the scan result. Lost and lost files are marked with a different color.
- Mark the information that needs to be reanimated, then click the "save" button.
Reanimation through Recuva
Recuva is one of the best resuscitation programs out there. Software is easy to use and can return almost any important photos, music, pictures, just connect your gadget to your computer.
A step-by-step guide to using Recuva.
- Run the utility, then mark the files you want. Next Next ".
- In the next window, select the disk with missing data, click "Start". If it is not visible, you need to click the refresh icon.
- After finishing the scan, mark what you want to save from the results page, and then click on "Reset", save them to a memory card, any other medium.

FoneLab
Solves many problems Android systems such as stuck in startup mode, accidental formatting, black screen and others. With its help, you can see and view the data that you want to reanimate. The process is very fast, all results are saved to the computer. The utility will open the storage itself, where it will automatically save the information.
EaseUS Mobisaver
Allows you to easily find and view deleted or lost documents(music, games, pictures,. After connecting a tablet or other gadget to a personal PC, the application will start scanning and return all your lost photos, videos, images, contacts.
7-Data Android Recovery
A utility required to recover information from a smartphone to operating system android. If you accidentally lost your personal documents, the application can easily help you solve this problem. If the program does not see the phone, it means that your device model is not supported.

Conclusion
- Trust only verified and licensed applications
- Always save your contacts to Google storage, use cloud sync
- Be sure to store your backup on a separate medium to avoid losing your documents in the future.
Video
7 Data Android Recovery is on this moment the most popular data recovery software for Android smartphones. However, it does not work correctly for all users. In some cases, software at all. What if the program doesn't want to work properly? In this guide, we will try to figure out why 7 Data Android Recovery does not see the phone and how you can fix this problem.
Causes of the problem and their solution
The program may not detect the smartphone or Tablet PC for one of several reasons. It all depends on the type of device used to connect it to the equipment, as well as the settings of the operating system.
Below is a list of reasons why a connection problem may occur and how to solve them:
- Disabled USB debugging
- Smartphone is not on standby
- The drivers for connecting the smartphone have not been updated
- Incorrect operation of the computer USB driver
- Wrong connection mode
- The phone is not rooted
This is probably the most common problem. The solution is easy, you just need to. To do this, go to the Android phone settings and find the "For Developers" section there, it will contain the "USB Debugging" item.

As strange as it may sound, in some cases, enabling the phone lock helps to solve the problem with the definition.
Outdated or uninstalled drivers to identify the device in Windows system can cause the 7 Data Android Recovery program to malfunction. To try to fix the situation, download the latest drivers from the website of the smartphone / tablet manufacturer, or update yourself through the device manager.
Check if all drivers on the system are up to date latest version... It often happens that to use some USB connectors on motherboard installation of an additional driver is required (for example, this often happens if the 3.0 standard is used on a laptop).

Please note that the smartphone must be connected in mass storage mode, not in tethering or charging mode. In these modes, the program will not be able to see the SD card.

Even if debug mode is activated and disk drive mode is enabled, recovery is impossible without obtained root rights (because by default the user cannot make changes to file system). You can learn more about how to get these rights on your device on specialized forums.
In some cases, there may be problems in the operation of the USB cable, due to which any file transfer operations, as well as work with the device through programs on a PC, become impossible. The phone simply won't be visible to your PC. Only replacing the cable with a new one or connecting a memory card through a card reader will help here.

Conclusion
In case all possible reasons the problems described above are excluded, and the program still does not want to detect the device, perhaps it is not supported. In this case, you can try using more old version program or one of its analogues.
Piriform's Recuva program is one of the most worthy representatives of tools for recovering deleted data (for example, after formatting or damaging removable drives). By the way, Piriform has made another good program- Speccy, we have it.
You can download Recuva completely free of charge on the official website. There is also a paid version (as of February 2018, its cost is 800 rubles), but it does not provide serious advantages. When installing, do not forget to select Russian and refuse to install CCleaner:
How to recover data with Recuva
After starting the program, a wizard will automatically start to help you recover your lost data. You can specify the type of files you want to recover, this will speed up the search (you can select the types: images, videos, documents, and so on):

Be sure to specify the path to the drive where you want to search, because by default Recuva will search for files wherever possible. It will take a very long time, and it will be difficult to find anything in the huge number of results.
If the files were simply deleted, Recuva will find them without any problems and offer to restore them:

If your drive has been formatted, and in other difficult cases, Recuva will offer you to do an in-depth analysis - agree. It can take quite a long time, depending on the size of the disk:

After the end of the search, click the "Switch to advanced mode" button, you will see something like this:

There can be quite a few items, because Recuva will find files and folders that have been deleted for a long time. You will be able to sort files by type, size or location. It remains only to select the necessary files and click the "Restore ..." button.
Recuva is a very useful application with which you can recover files and folders that have been permanently deleted.
If you have accidentally formatted a USB flash drive, or you need deleted files after emptying the recycle bin, do not despair - Recuva will help you put everything back in place. The program has high functionality and convenience in finding missing data. Let's figure out how to use this program.
1. The first step is to go to the developer's website and download the program. You can choose from both free and commercial versions. To recover data from a flash drive, it will be enough free.

2. Install the program following the prompts of the installer.

3. Open the program and start using it.
How to recover deleted files using Recuva
When launched, Recuva allows the user to customize the search parameters for the desired data.
1. In the first window, select the data type, the same format - images, video, music, archives, Email, Word documents and Exel or files of all types at once. Click on "Next"

2. In the next window, you can select the location of files - on a memory card or other removable media, in documents, the trash can, or a specific place on the disk. If you don’t know where to look for the file, select “I’m not sure”.

3. Recuva is now ready to search. Before starting it, you can activate the advanced search function, but this will take longer. It is recommended to use this function in cases when the search did not return any results. Click "Start".

4. Before us is a list of the data found. A green circle next to the name means that the file is ready to be restored, yellow - that the file is damaged, red - the file cannot be restored. Check the box opposite desired file and click "Recover".

5. Select the folder on your hard drive where you want to save the data.

Modern smartphones and tablets are used to store information and process information just as often as computers. Accordingly, the problem of accidental data loss is no less relevant here: valuable photographs, videos, important documents - sometimes the loss is irreparable.
As with the return of lost data on a computer, the key to successful recovery of deleted files on Android is the exclusion of further writing to the media. Simply put, as soon as you find that the files you need are erased, you need to immediately pull out the memory card or completely turn off the smartphone. These precautions will help prevent overwriting memory locations.
Using a computer
The easiest way to recover files deleted on an Android device is from a computer. Will help to do this special programs like Recuva or 7-Data Android Recovery. But in order to take advantage of their capabilities, you first need to enable USB debugging on your phone or tablet - this is necessary for the device to be detected in the system as removable drive.
Enabling debugging:
If there is no "For Developers" section, follow these steps:
- Open "Settings".
- Scroll down the menu to the About Phone section.
- Find the item "Build number" and tap on it 7 times. As you tap, a notification will appear telling you how many more times you need to tap to become a developer.
After enabling debugging, the smartphone connected to the computer will be detected as an external drive from which you can recover almost any deleted data.
7-Data Android Recovery
7-Data Android Recovery, like Recuva, works without root rights recovering files deleted from media. The only unpleasant moment is that you will have to pay for using the 7-Data software.

Save the found data to your computer, not to the phone's memory. When the recovery is complete, just transfer the files to your smartphone.
Recuva
The Recuva utility allows you to recover data from any media, incl. from microSD cards and the internal memory of the smartphone. The procedure does not differ from the recovery algorithm via 7-Data Android Recovery:

After scanning, you will receive a report on the data found that can be recovered. There is a circle next to each file, the color of which you need to pay attention to:
- Green - information can be recovered without any problems.
- Yellow - the file is possibly damaged.
- Red - data cannot be returned.
You just have to select the files and click "Recover" to get back the lost information. 
The programs EaseUS Mobisaver and Undelete for Root Users operate in a similar way, however, they require root access, so it is better to first try to solve the problem using Recuva and 7-Data.
Application use
If there is no way to recover files on Android via a PC, then you will have to resort to using special applications. The main disadvantage of this method is the need to obtain root rights - without them, the application will not gain access to memory.
As an example, let's look at the Undeleter program, which can recover files from an external flash card and internal memory. Unfortunately, no purchase full version only the function of returning images is available, but if you are satisfied with the work of the application, then a small financial investment should not be a problem. 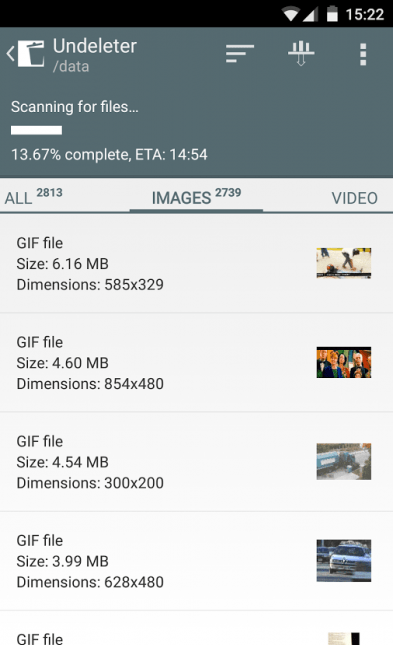
The application interface is friendly to novice users. You need to specify the folder where the deleted data was stored, after which a memory scan will start. As a result, the program will issue a full report containing files that can be recovered from the phone.
It is often easier to prevent a problem than to deal with the consequences later. Deleting important information is definitely one of those unpleasant situations that should be avoided. Therefore:

Let's take the Dumpster app as an example. After installing it, you specify what types of files are sent to the Trash and how long they will be stored there. If necessary, you do the same as with the Recycle Bin on your computer - empty it or restore accidentally deleted files.